
 tutorial Details
- Program: Illustrator
- Difficulty: Beginner
- Completion Time: 30 minutes
Introduction
If you are using Illustrator for detailed imagery creation, the Blend Tool can be your most important tool. Compared to the Gradient Mesh Tool, the Blend Tool is a Live tool, meaning that you can change its object or shape, its color or position, and the blend will be updated live. You can create blends either with the Blend Tool or the Make Blend command. One thing to remember though, the Blend Tool takes a lot of RAM, so it may slow down your computer.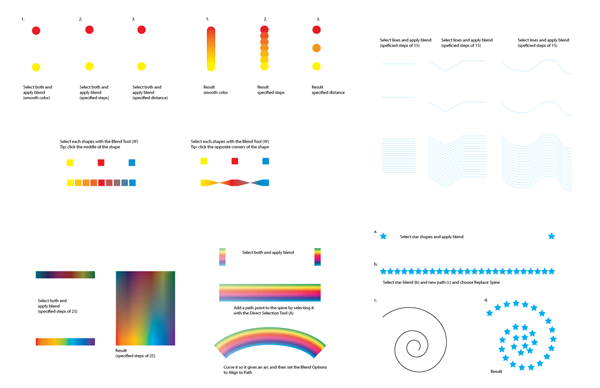
1. The Blend Tool
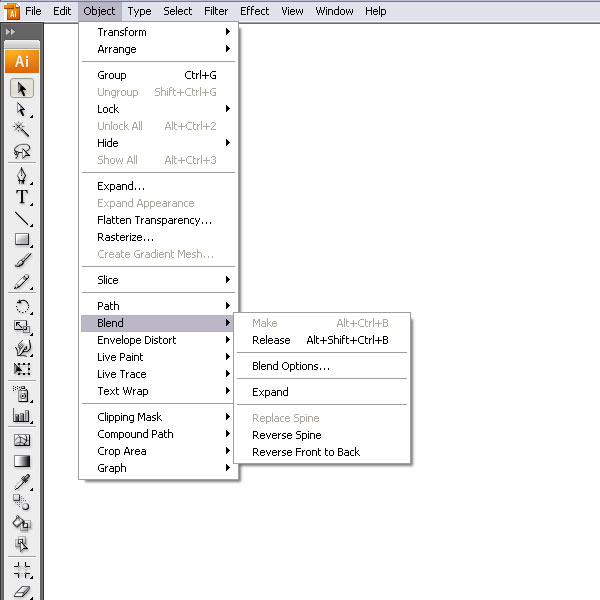
Overview and Keyboard Shortcuts (see image below for Menu items):- Blend Tool (W)
- Blend selected paths or shapes (Ctrl + Alt + B)
- Release blend (Shift + Ctrl + Alt + B)
- Expand to make blend permanent
- Reverse Spine to flip a blend
- Replace Spine to apply a different path
- Reverse Front to Back to reverse the stacking position of blends (useful for animation)

2. Blends with Various Shapes
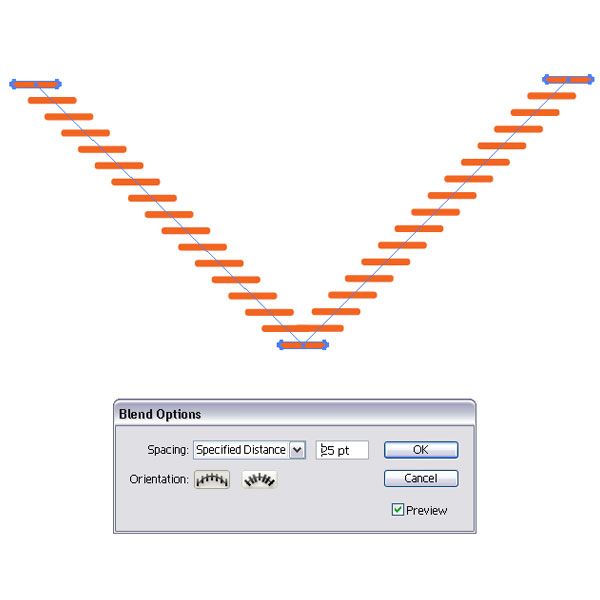
You can make a blend between open paths like lines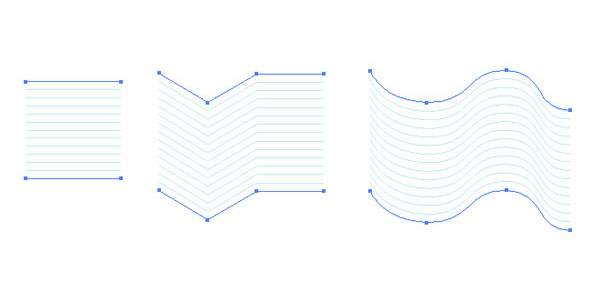

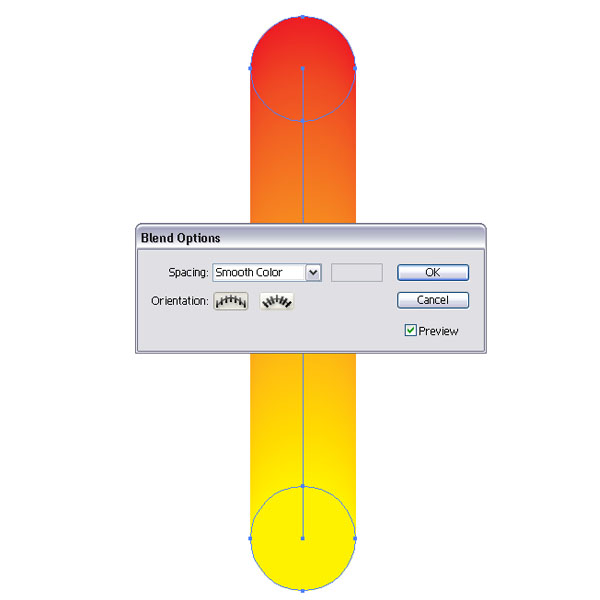
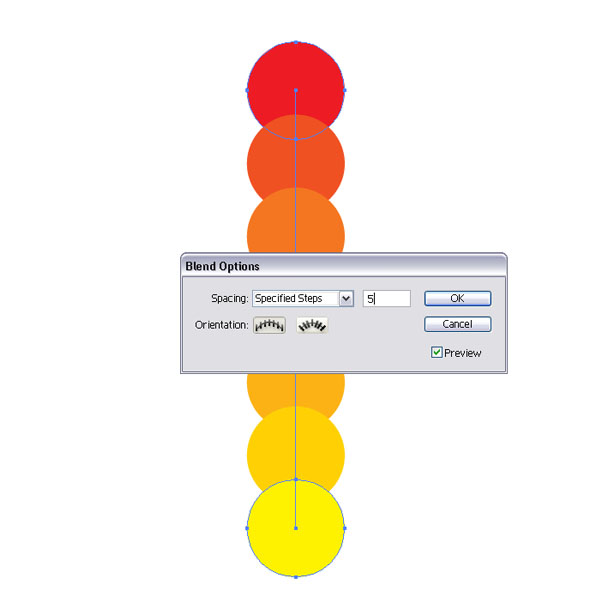
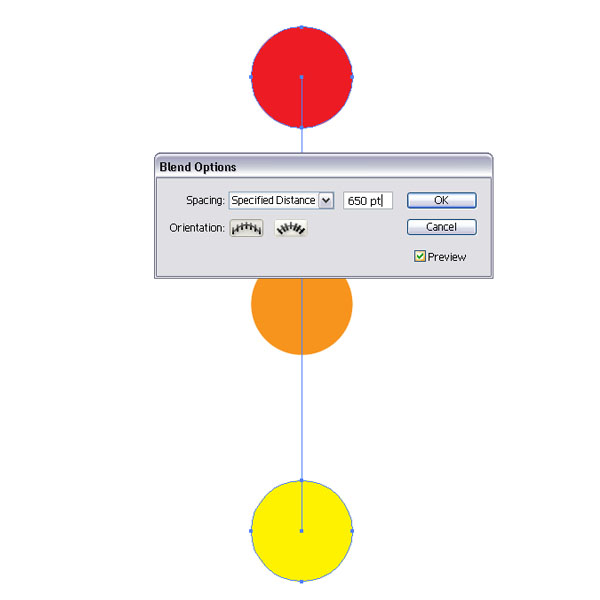
3. Blend Options Palette
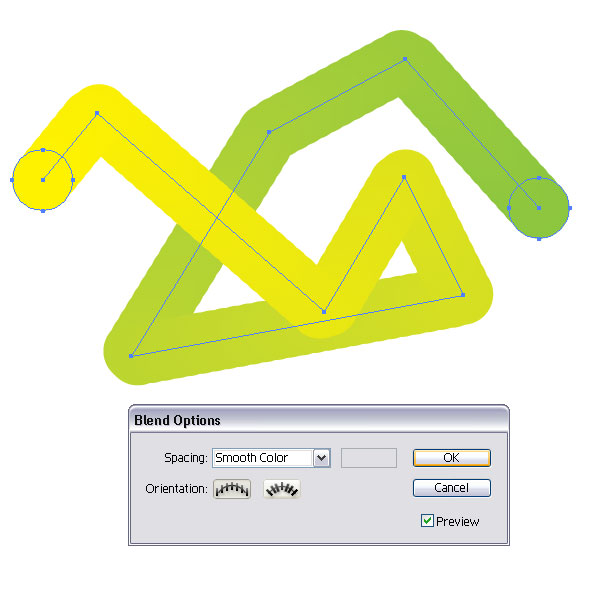
Under Object > Blend > Blend Options, you will find different settings that you can apply:Smooth Color
Specified Steps
Specified Distance
4. Applying Blends with the Blend Tool (W)
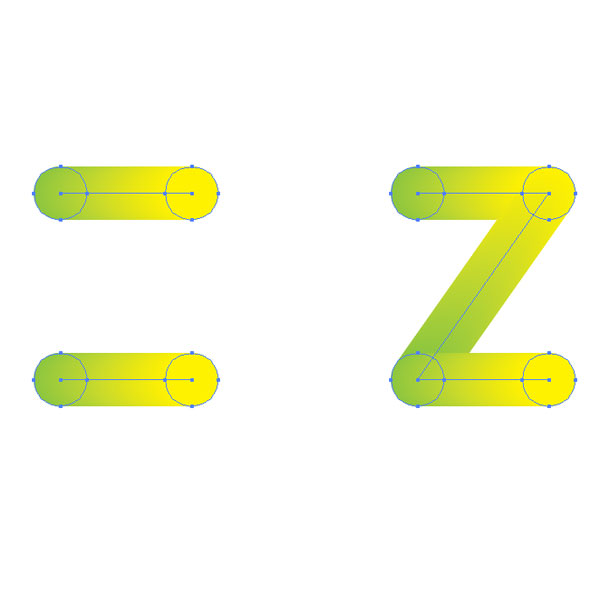
When selecting the Blend Tool (W), you can easily morph two or multiple colors together. Also, by clicking on the corner points of a shape instead of the middle, you can morph the shape into a mirrored object.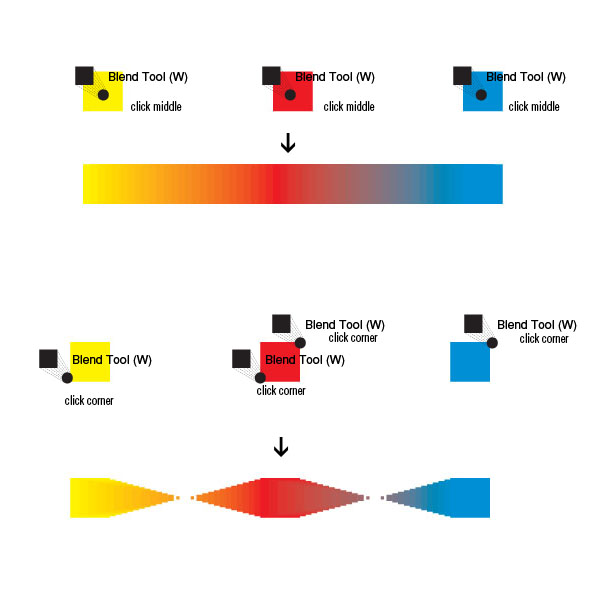
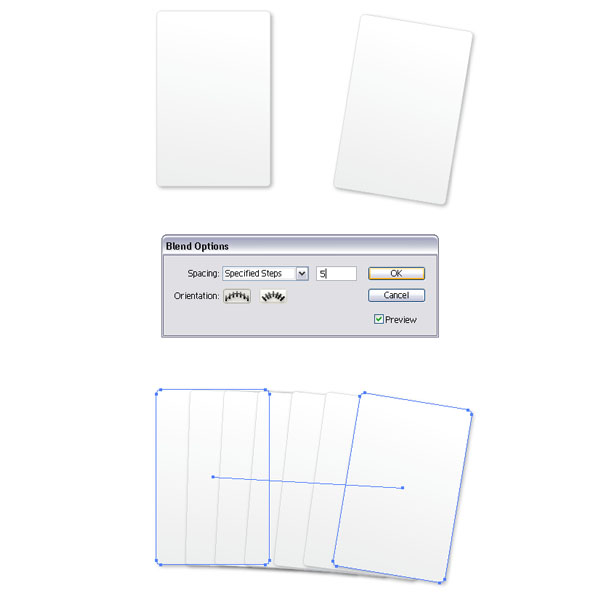
5. Blending Different Shapes
When morphing two or more different shapes together, you can easily built up complex objects.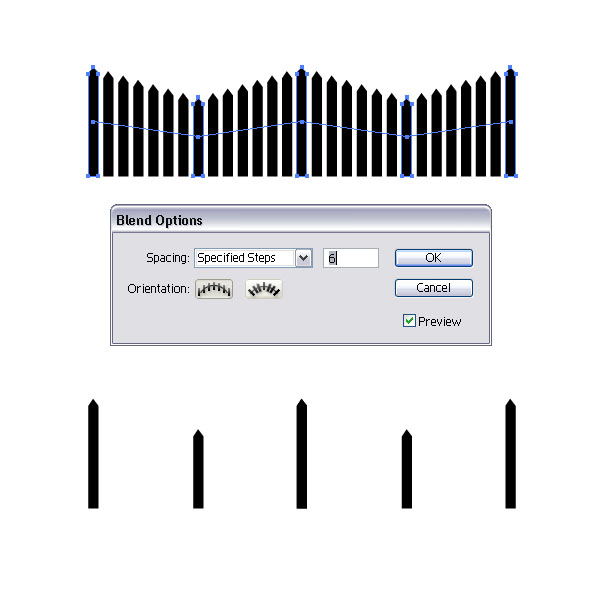
6. Blending Shapes with Different Gradients
You can blend two shapes with a different gradient and achieve some neat effects. These objects can be used as backgrounds or part of more complex shapes you are creating.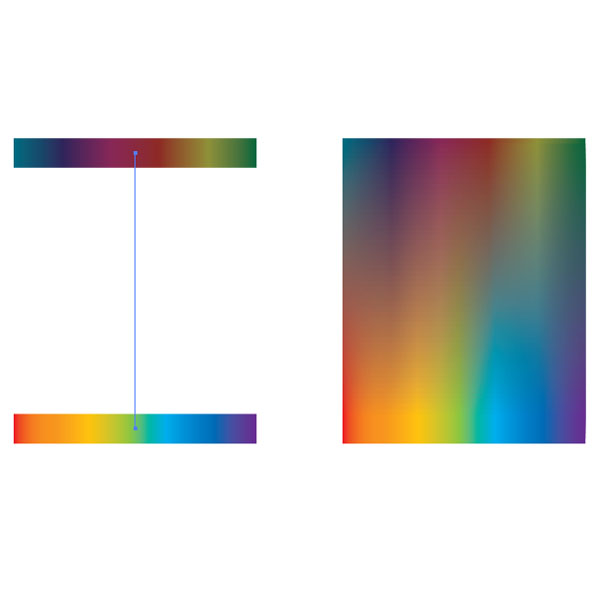
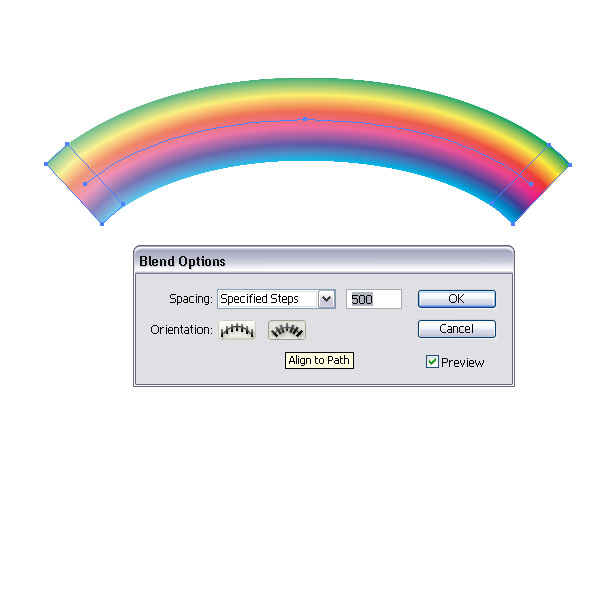
7. Aligning blends Along a Path
Once you applied a Blend, you can modify the path that the blend runs along.Along a path with Specified Steps
Along a path with Smooth Color
Along a path with Specified Distance
8. Replace Spine Option
Once you have created a blend, you can change the path that it runs along. Just create a path to your liking, select both the path and the blend and go to Object > Blend > Replace Spine.
9. Align to Path or Page
Once you have created a blend and applied a specific path, it can be important that in the Blend Option Palette you choose the correct options.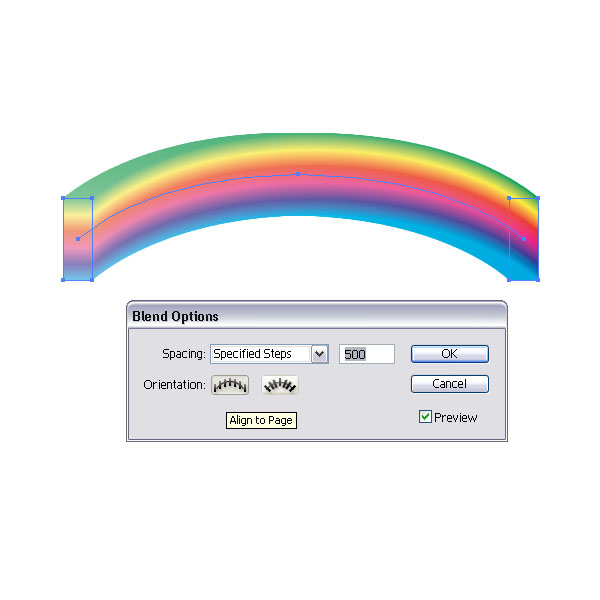
10. Reverse Spine
If you want to have a spine reversed, for example have a gradient blend run reverse, you can achieve this by selecting your blend and going to Object > Blend > Reverse Spine.

11. Creating Highlights With Blends
You can create some neat highlights for shapes with blends. Especially where the Gradient Tool doesn’t work so well.
12. The Possibilities are Endless!
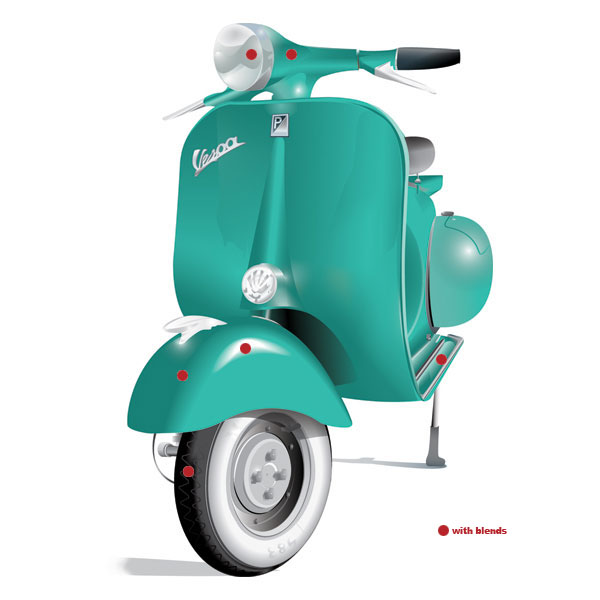
When working with blends, you can create some really interesting stuff. You can even blend symbols, outlined fonts, or brushes. Remember though that blends are RAM suckers and your AI file could get heavy. Nevertheless, they can save you time and help you create some awesome effects.Below is an illustration that I made quite a while back. The Blend Tool was next to the Gradient Tool as one of my most important tools in creating this piece. Have fun using the Blend Tool in your work.
Tidak ada komentar:
Posting Komentar