
Tutorial Details
- Program: Adobe Illustrator CS3 - CS5
- Difficulty: Intermediate
- Estimated Completion Time: 3 hours
While reading this tutorial, you’ll learn some excellent vector
illustration techniques, as well as use various powerful Illustrator
tools. We’ll construct a street lamp object based illustration using
blends, gradient meshes, art brushes, and more. Follow along, while
creating your own impressive artwork.
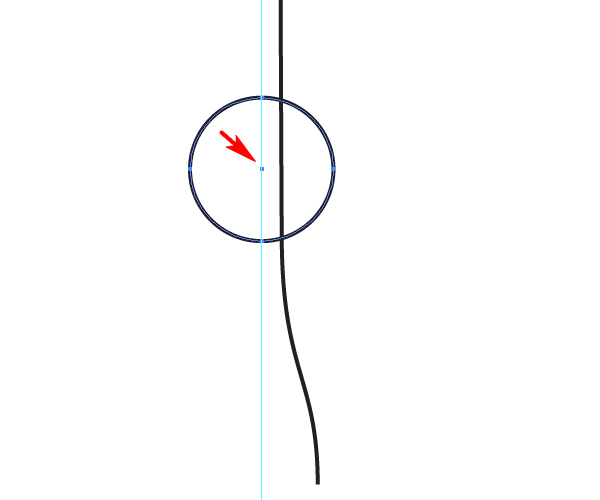
 Sketch a circle using the Ellipse Tool (L). Focus your attention on
locating the center of the circle. It should be placed on the guideline.
Sketch a circle using the Ellipse Tool (L). Focus your attention on
locating the center of the circle. It should be placed on the guideline.
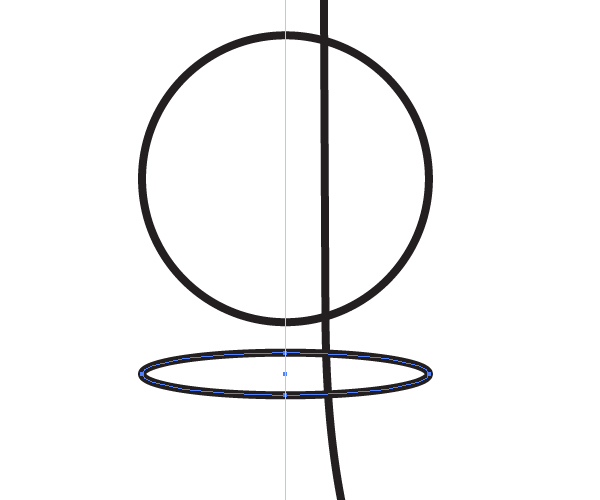
 And sketch an ellipse the same way.
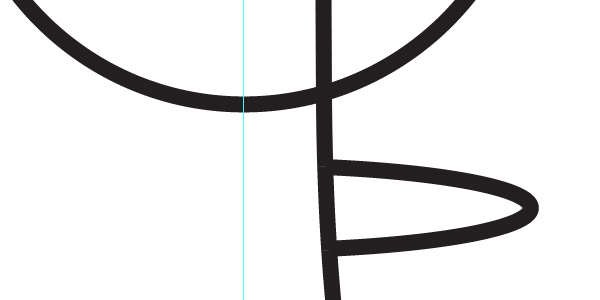
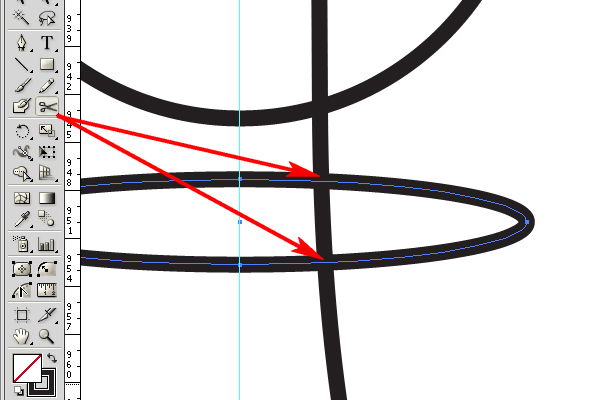 Delete the left part of the ellipse after that.
 Then lock all the paths apart from the first illustrated, and repeat the same manipulations as shown in the image below.
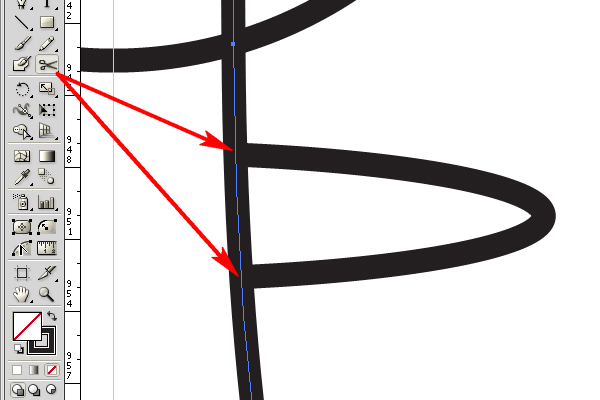 Delete the middle part of the path.
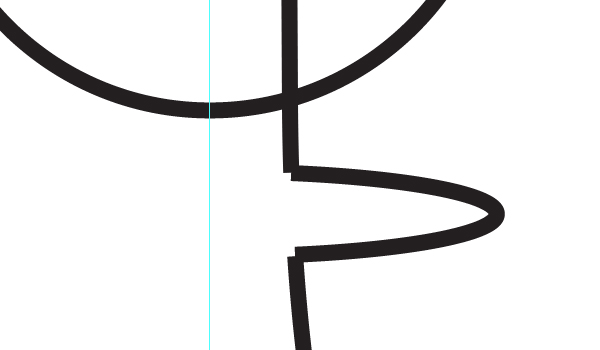 Do the same with the circle. And then select all the received paths
and go to Object > Path > Join (Command + J). And change the color
of the path as you desire.
Do the same with the circle. And then select all the received paths
and go to Object > Path > Join (Command + J). And change the color
of the path as you desire.
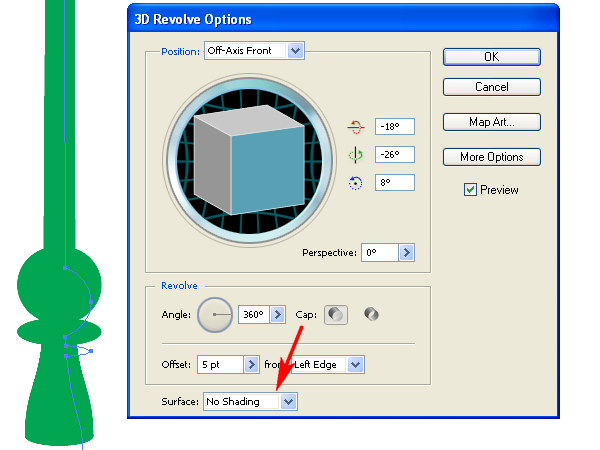
 When you are satisfied with the support shape, go to the Appearance
palette and click there the link “3D Extrude & Bevel” to edit the
effect. Set the rendering style to “No shading” as shown. You need to do
this in order to decrease the quantity of paths after expanding.
When you are satisfied with the support shape, go to the Appearance
palette and click there the link “3D Extrude & Bevel” to edit the
effect. Set the rendering style to “No shading” as shown. You need to do
this in order to decrease the quantity of paths after expanding.
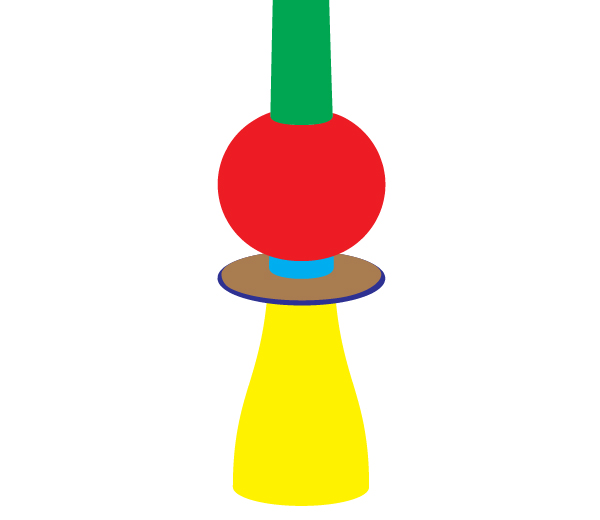
 Unite all the necessary paths using the Pathfinder palette or the
Shape Builder Tool (Shift + M), and delete all the superfluous paths.
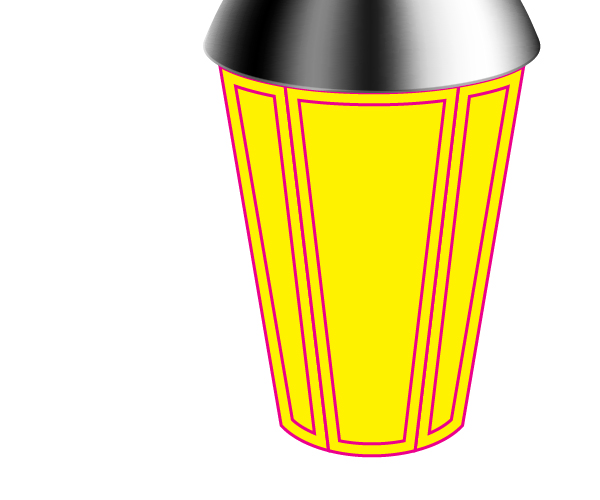
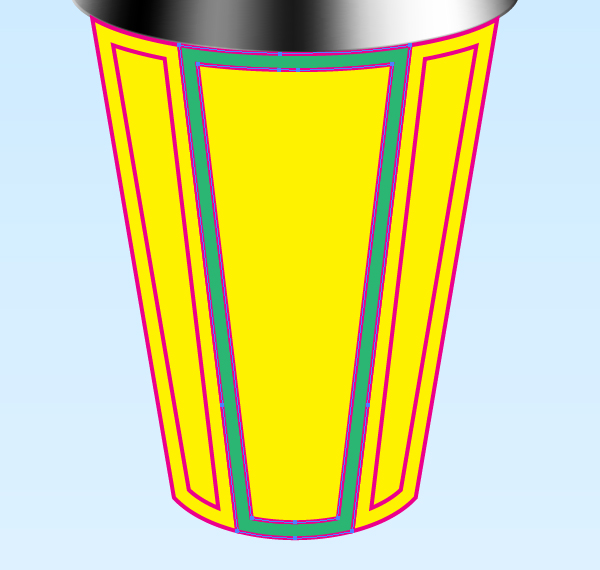
After these actions you should receive six different paths. Fill them
with various colors for your convenience. (The top elongated vertical
path is green and shown partially in the diagram below):
Unite all the necessary paths using the Pathfinder palette or the
Shape Builder Tool (Shift + M), and delete all the superfluous paths.
After these actions you should receive six different paths. Fill them
with various colors for your convenience. (The top elongated vertical
path is green and shown partially in the diagram below):
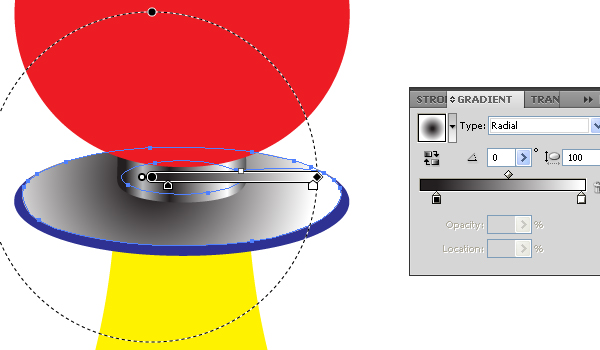
 Select the brown path and fill it with a radial gradient.
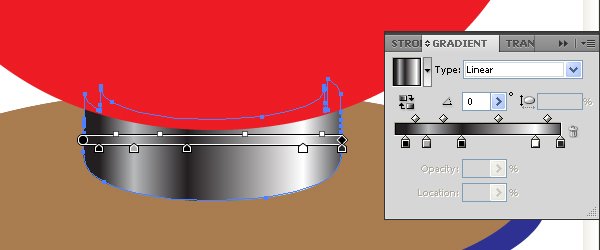
 The violet path should be filled with a linear gradient too.
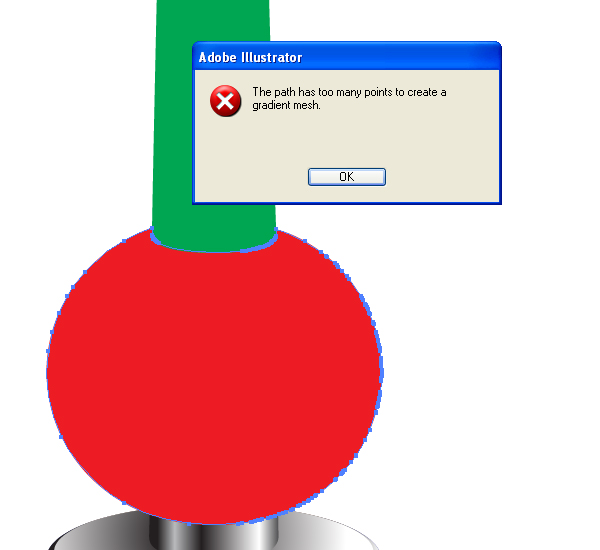 Oops! We cannot convert this path to a mesh. What should we do? I
advise you to go to Object > Path > Simplify and set there the
items that you can see in the diagram below.
Oops! We cannot convert this path to a mesh. What should we do? I
advise you to go to Object > Path > Simplify and set there the
items that you can see in the diagram below.
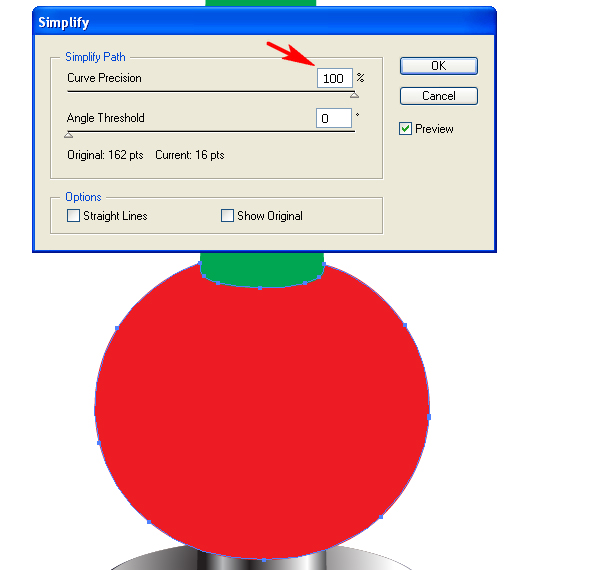 As you can see, after this simple operation the quantity of the
anchor points are eliminated down to ten. And the initial contour was
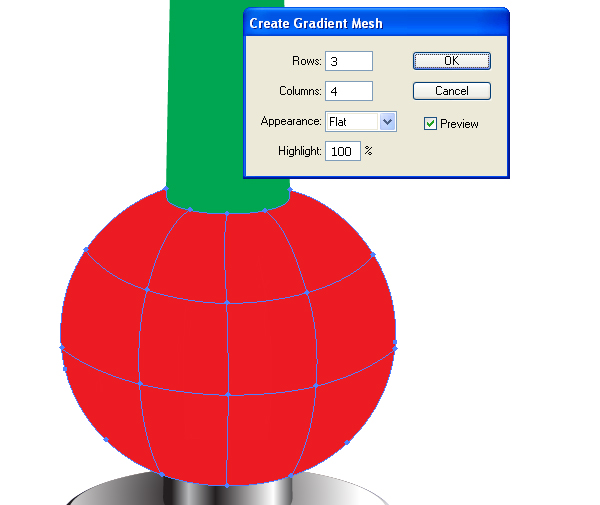
saved. Now you may go to Object > Create Gradient Mesh again.
As you can see, after this simple operation the quantity of the
anchor points are eliminated down to ten. And the initial contour was
saved. Now you may go to Object > Create Gradient Mesh again.
 Take the Mesh Tool (U) and change the colors of the mesh nodes in
accordance with the light distribution principle. Besides, you can add
lines to the mesh using this tool if necessary. You should receive the
result shown below.
Take the Mesh Tool (U) and change the colors of the mesh nodes in
accordance with the light distribution principle. Besides, you can add
lines to the mesh using this tool if necessary. You should receive the
result shown below.

 Then go to Object > Expand to expand this gradient to a gradient mesh. Then go to Object > Ungroup.
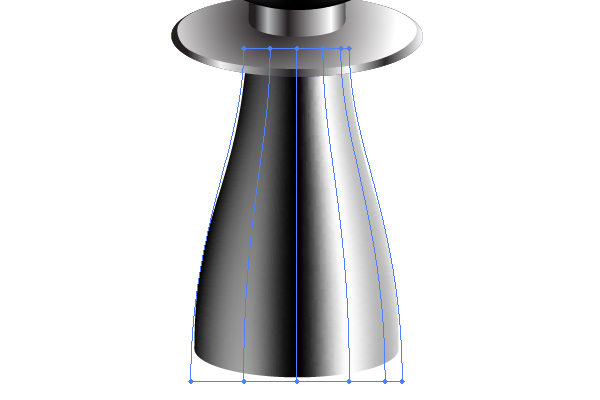
 Take the Lasso Tool (Q) and select the top mesh nodes with the aid of it.
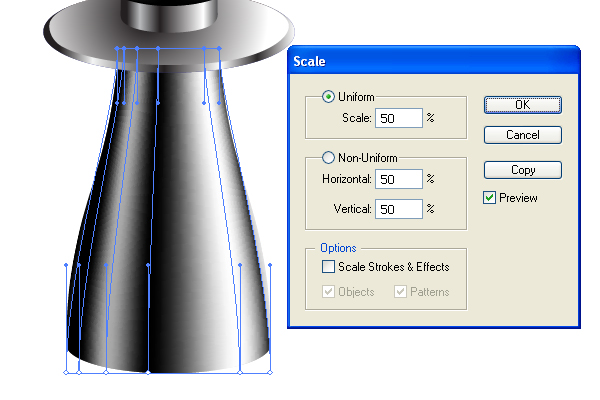
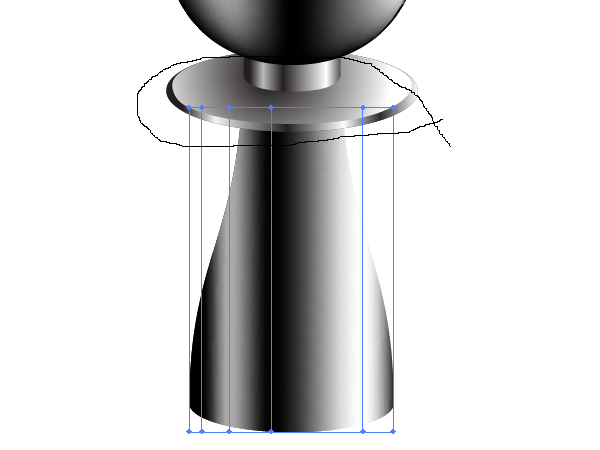 Now go to Object > Transform > Scale, and impart the yellow
path shape to the mesh. Do the same then with the lower mesh nodes.
Now go to Object > Transform > Scale, and impart the yellow
path shape to the mesh. Do the same then with the lower mesh nodes.
 Change the node colors slightly. Follow the diagram below.
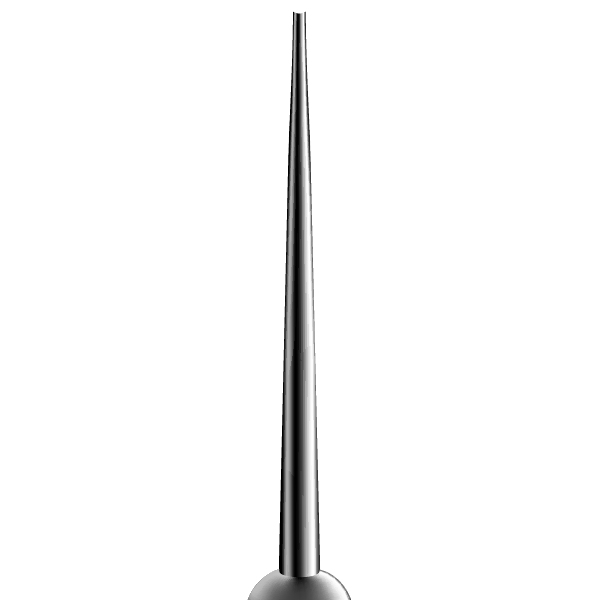
 Repeat these manipulations with the green vertical elongated path.
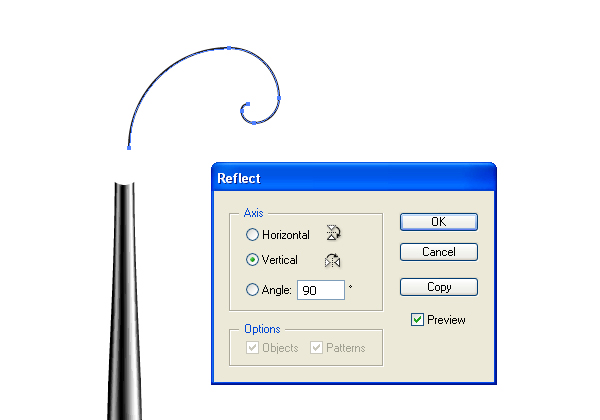
 In the beginning I want to illustrate the right lamp. If you want the same, go to Object > Transform > Reflect.
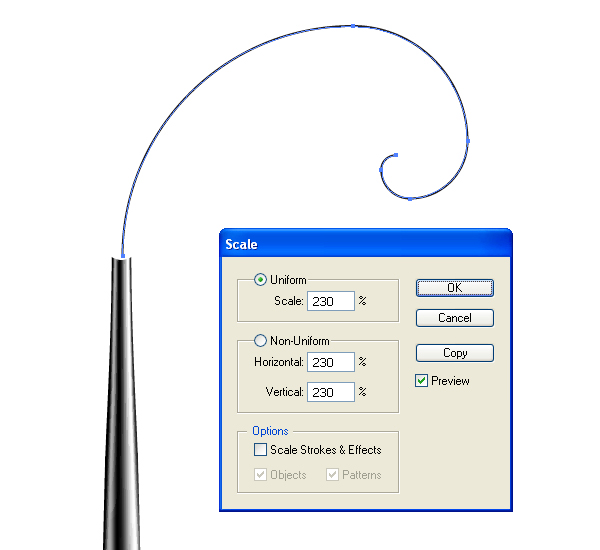
 Go to Object > Transform > Scale, as necessary in your own artwork.
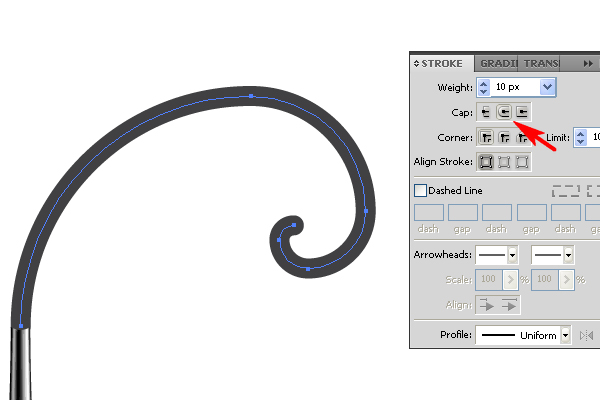
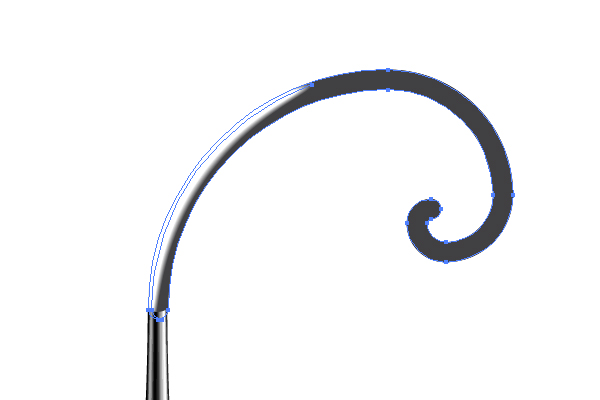
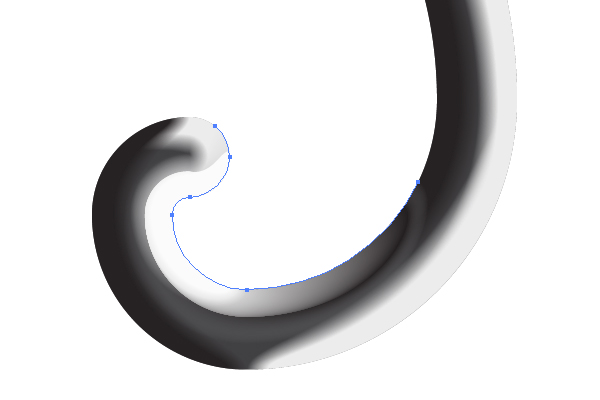
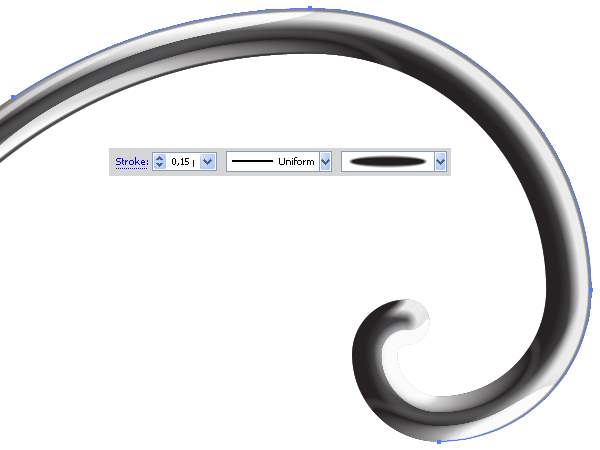
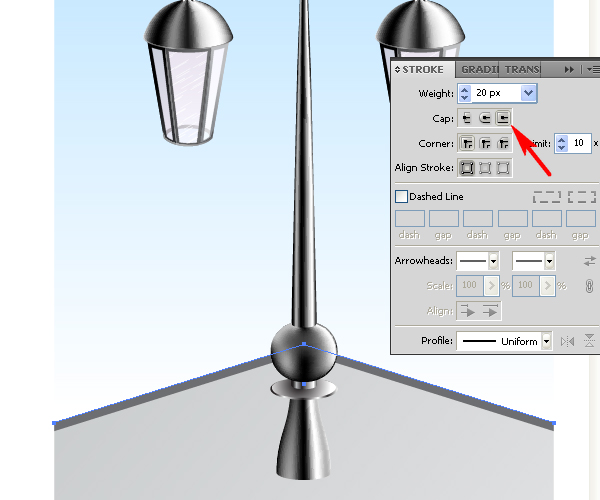
 Change the Stroke Weight, and set the Round cap in the Stroke
palette. Then send the spiral path backward. Also, decrease the light
intensity slightly. In other words, let it be dark gray.
Change the Stroke Weight, and set the Round cap in the Stroke
palette. Then send the spiral path backward. Also, decrease the light
intensity slightly. In other words, let it be dark gray.
 Go to Object > Transform > Scale, and set the values shown in the diagram below. Then click the Copy button.
 Change the Opacity of the biggest ellipse to 0.
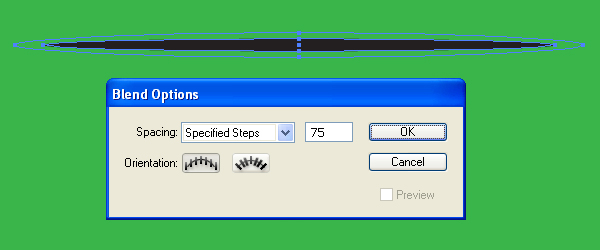
 Go to Object > Blend > Blend Options. Set the Spacing to Specified Steps, and the quantity of steps to about 75, or more.
 Then go to Object > Blend > Make (Command + Alt + B).

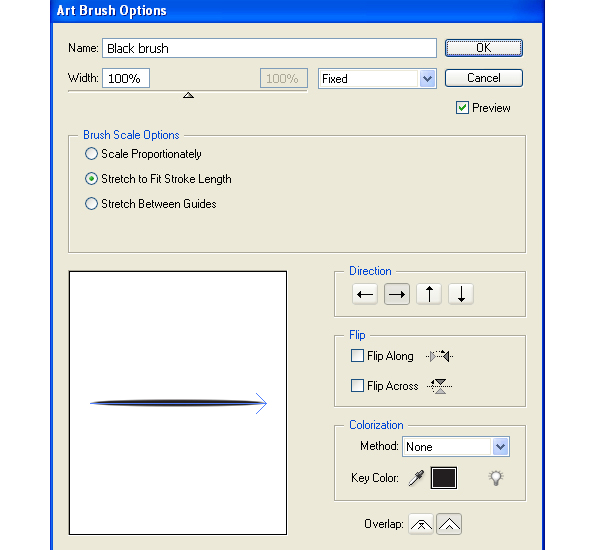
 Set the items for the brush as shown in the diagram below, and name the brush as “Black brush.”
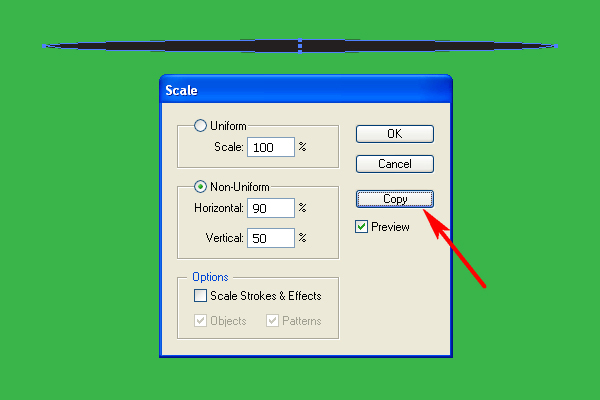
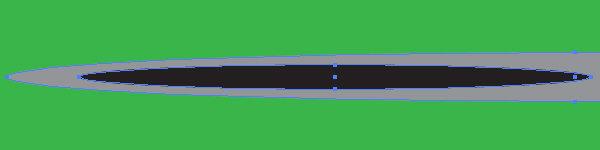
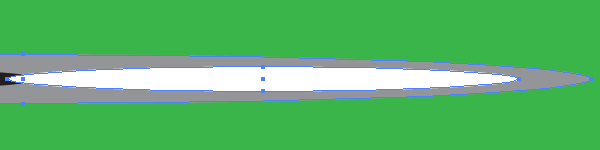
 Illustrate the analogous Art brush named as “White brush.” (Properly
speaking I have used the green background in order to show the “White
brush” which is invisible on white).
Illustrate the analogous Art brush named as “White brush.” (Properly
speaking I have used the green background in order to show the “White
brush” which is invisible on white).

 Produce the black ellipse over it at the left corner of the gray one.
 Now draw the white ellipse at the right corner of the gray one.
 Change the gray ellipse Opacity to 0.
 And make a blend from all these three ellipses.
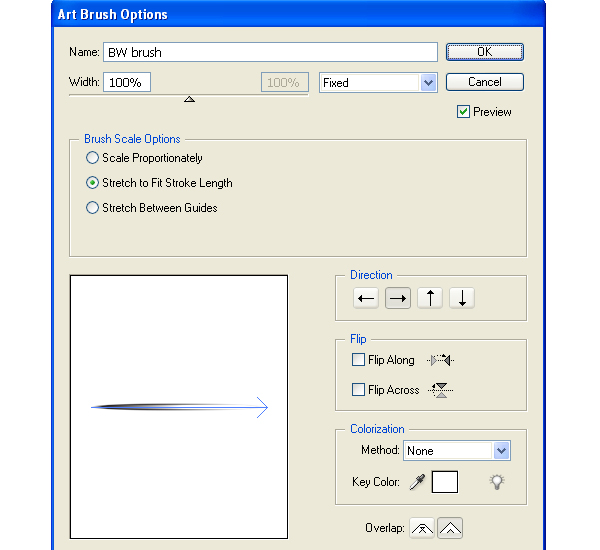
 Produce the Art “BW brush” from this blend as shown.
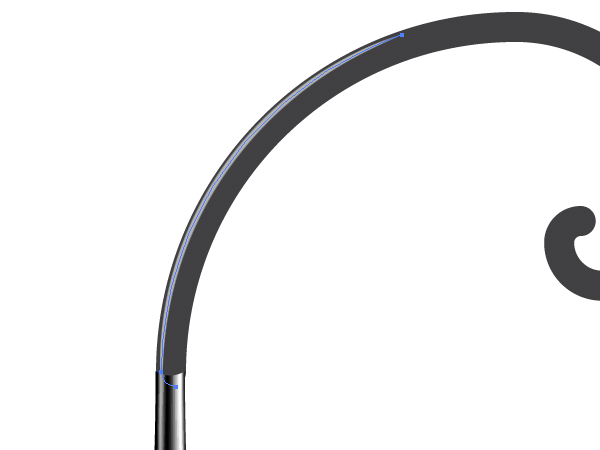
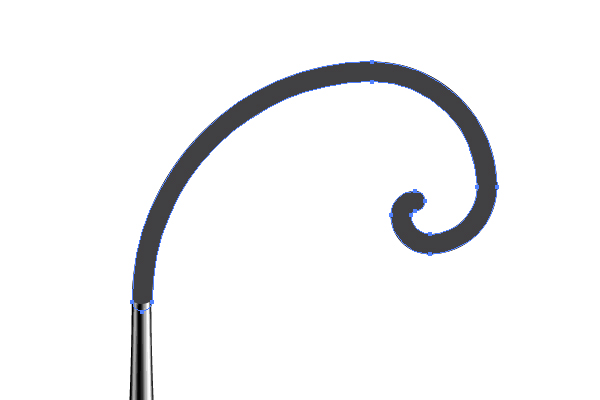 Illustrate the shown path over the spiral one, and apply the “White brush” to it.
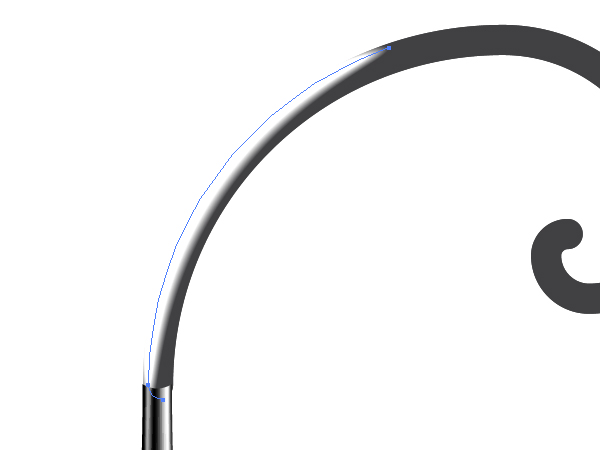 Select the copy of the spiral path, which has just been made, and
place it over the second path to that has the brush applied to it.
Select both of these paths,…
Select the copy of the spiral path, which has just been made, and
place it over the second path to that has the brush applied to it.
Select both of these paths,…
 …and go to Object > Clipping Mask > Make (Command + 7).
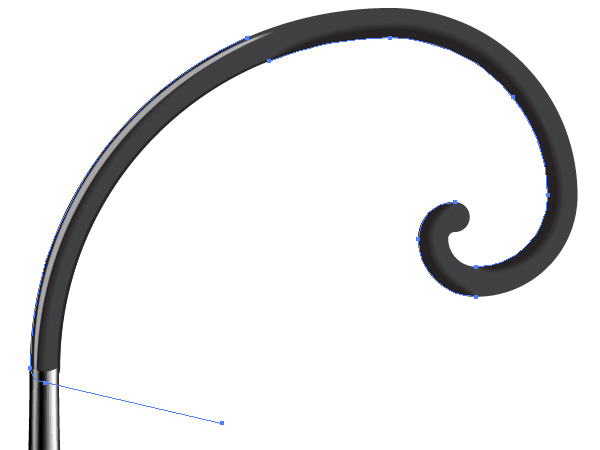
 Then change the Opacity and the Stroke weight of the path to which the brush is applied.
 Apply the “Black brush” to the following paths. Crop the paths with a clipping path.
 Repeat these manipulations with other paths to which the “White brush” has been applied.
 The following path goes from light to shadow. So it would be correct to apply the “BW brush” to it.
 Apply the “BW brush” to the following three paths shown in the figure
below, because those paths go from light to shadow as well.
Apply the “BW brush” to the following three paths shown in the figure
below, because those paths go from light to shadow as well.

You can do it by using the Art brushes and decreasing the Stroke weights of the paths. But pay attention that you need to use brushes that differ in color from the surrounding pixels of the objects. In order to see how this rule works let’s illustrate the first path shown in the area of light, then apply the “Black brush” to it.
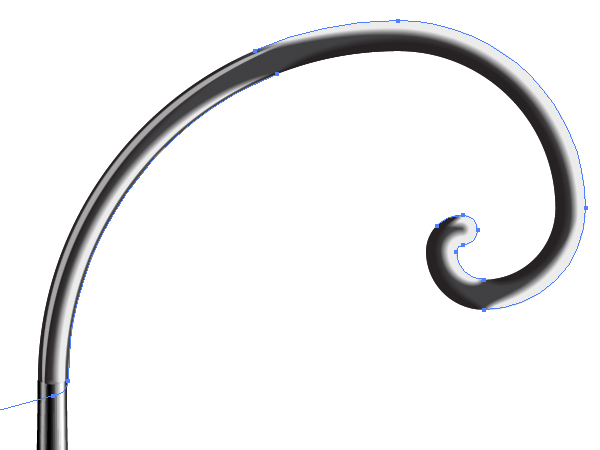
 Now apply the “BW brush” to the twisted end of the spiral.
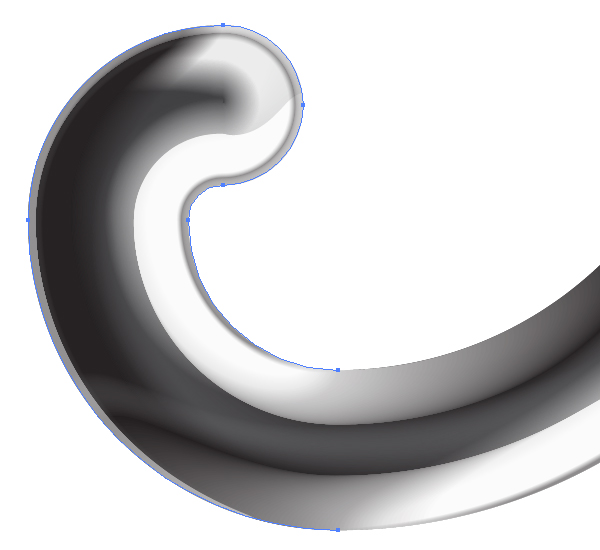 And apply the “White brush” to the darkened part of the spiral.

 After applying the “Black” and “White brushes” and cropping the paths
with the corresponding clipping path, you’ll receive the following
result. (Up to this point in the tutorial you already know how to
achieve this without assistance. Just apply the techniques you learned
earlier in the tutorial here.
After applying the “Black” and “White brushes” and cropping the paths
with the corresponding clipping path, you’ll receive the following
result. (Up to this point in the tutorial you already know how to
achieve this without assistance. Just apply the techniques you learned
earlier in the tutorial here.
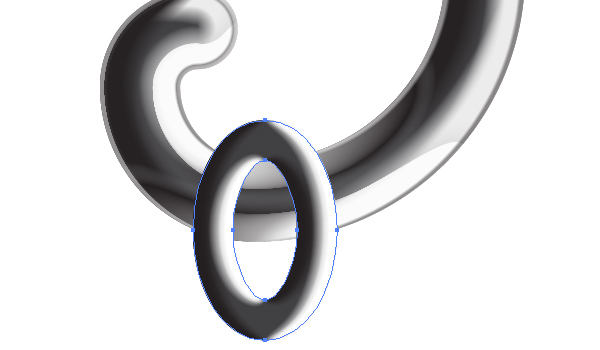
 …then select the ring, Copy it and Paste in Front too (Command + C then Command + F).
 Then select both copies of the paths,…
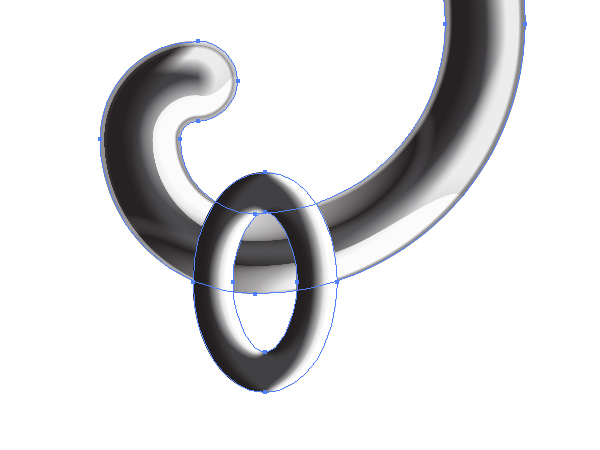 …grab the Shape Builder Tool (Shift + M), and drag the mouse pointer
across the shown parts. Or use the Pathfinder palette for this
operation.
…grab the Shape Builder Tool (Shift + M), and drag the mouse pointer
across the shown parts. Or use the Pathfinder palette for this
operation.
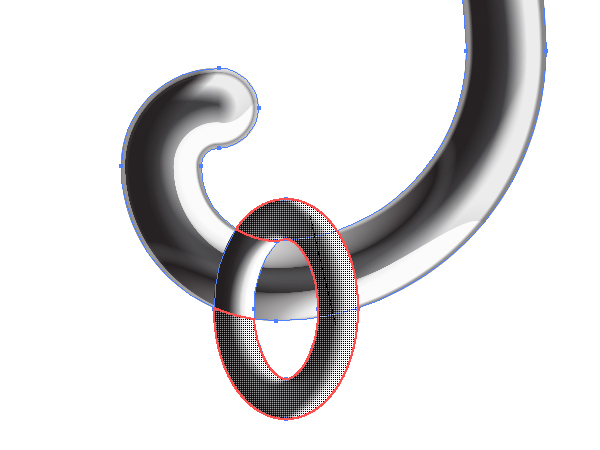 And after that delete all the paths with the exception of the yellow one. (It is filled with yellow for your convenience).
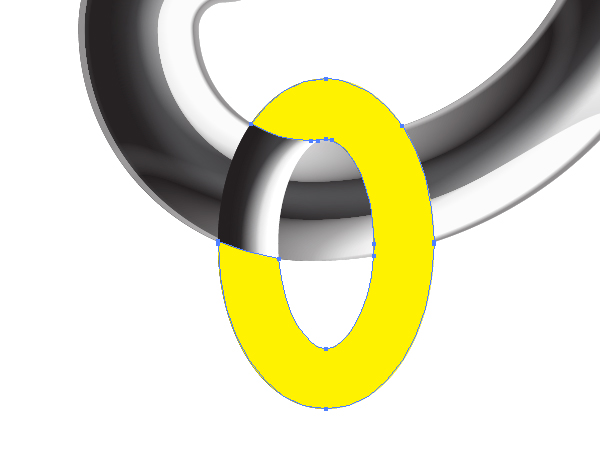 The yellow outline is a clipping path for the ring.
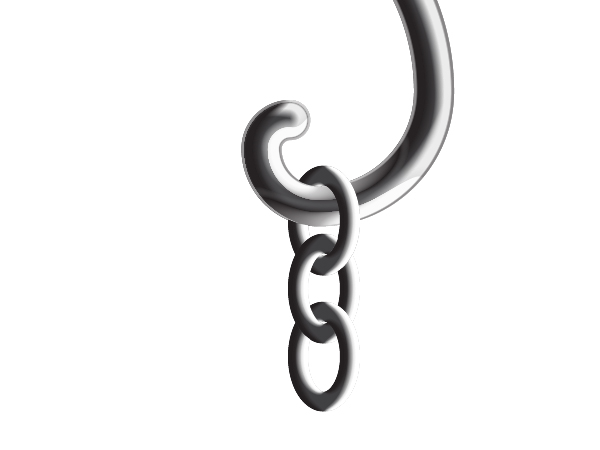
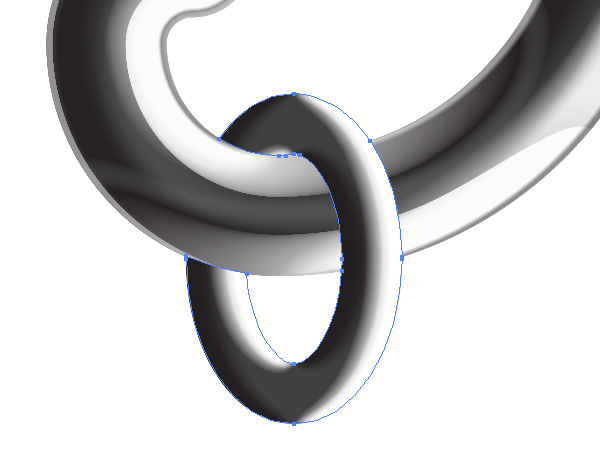 Illustrate as many rings of the chain as you desire.
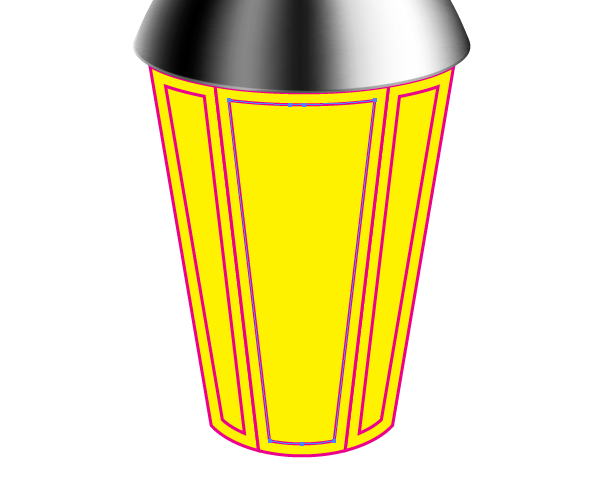
 After expanding the 3D object, and uniting the received paths, you’ll get the next yellow path.

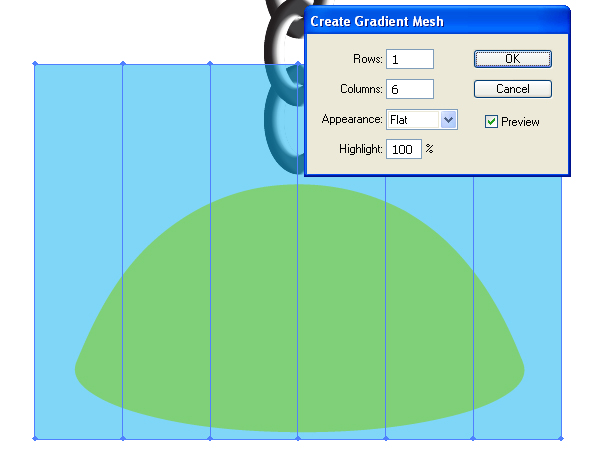
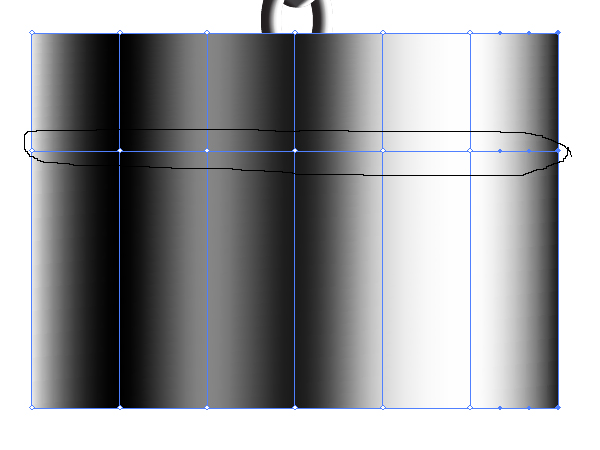
 Go to Object > Create Gradient Mesh and set there the values that you see in the diagram below.
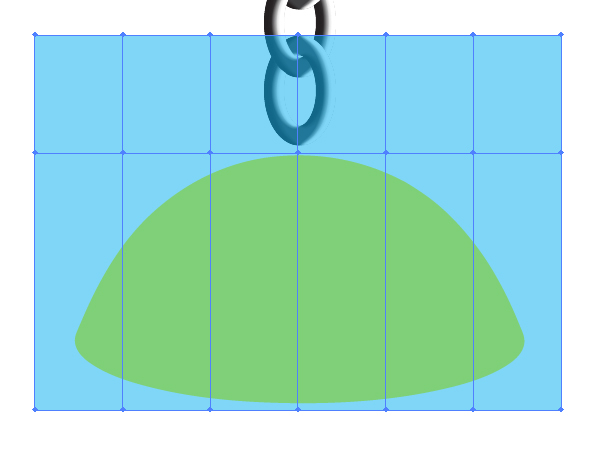
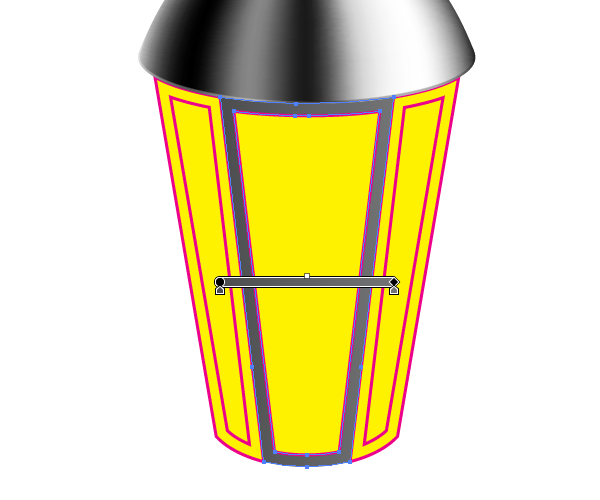
 Take the Mesh Tool (U) and add a horizontal mesh line as shown. The horizontal mesh line must touch with the yellow path.
 Then change the Opacity of the mesh to 100%.
 Apply the clipping path, which is formed from the yellow outline, to the mesh.
 Grab the Lasso Tool (Q) again and select the mesh nodes shown in the image below.
 Go then to Object > Transform > Scale and set there the values shown in the diagram below.
 Make the clipping path visible again.
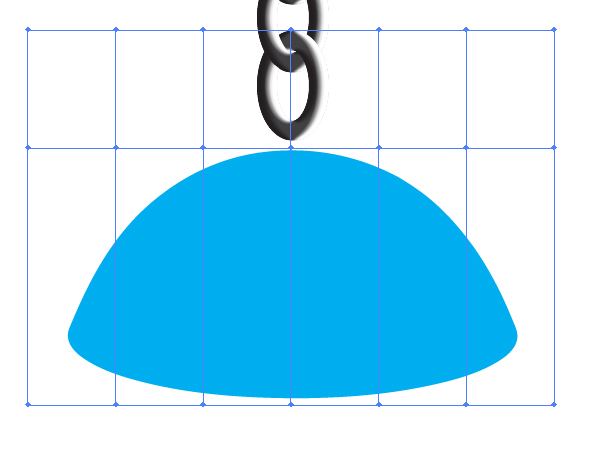
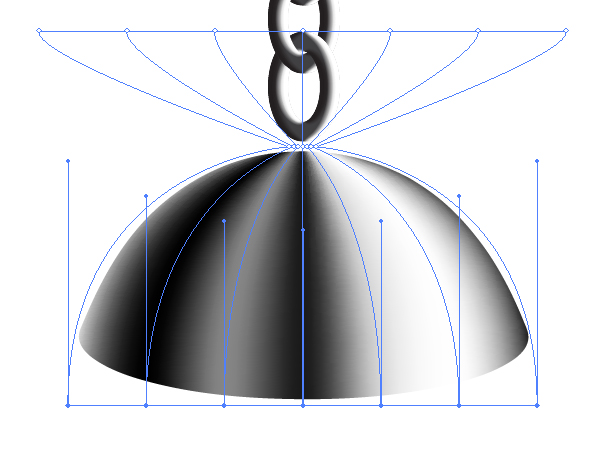
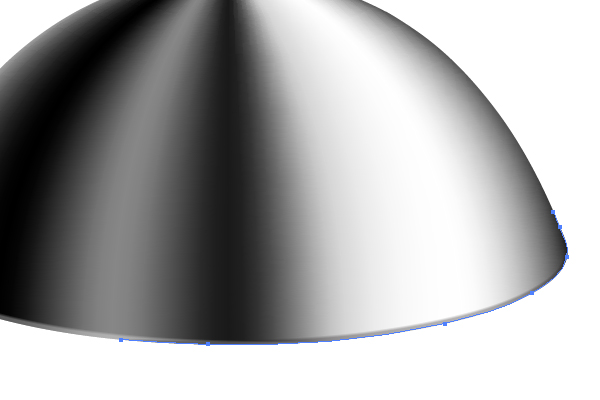
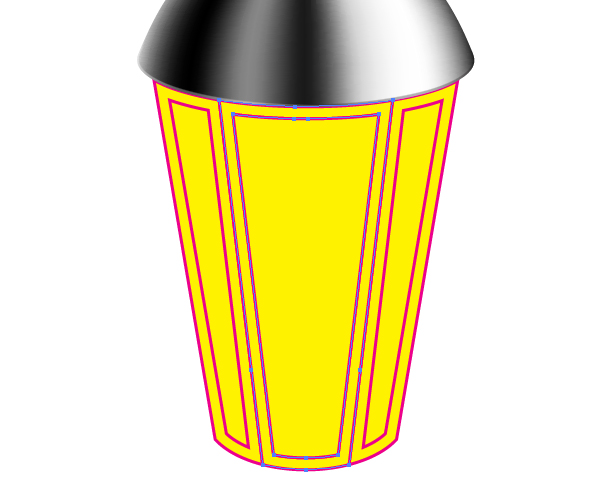
 Transform the mesh to the view of the hemisphere shape with the Direct Selection Tool (A) aid.
 Apply the “Black brush” to the second side of the cupola.
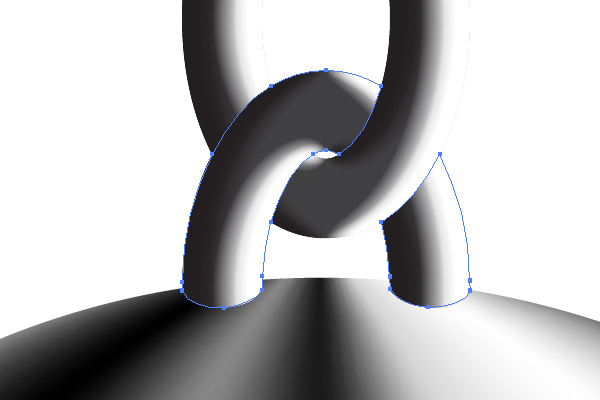
 Connect the cap of the lantern to the chain.
 Select one of the paths, and go to Object > Path > Offset Path, and set there the following values:
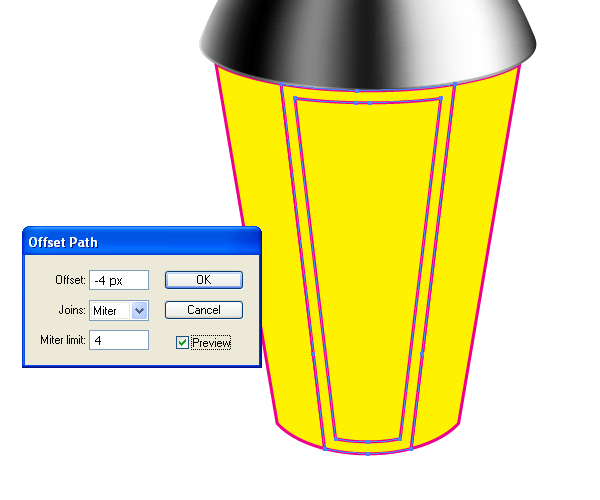 Repeat this manipulation with the other paths.
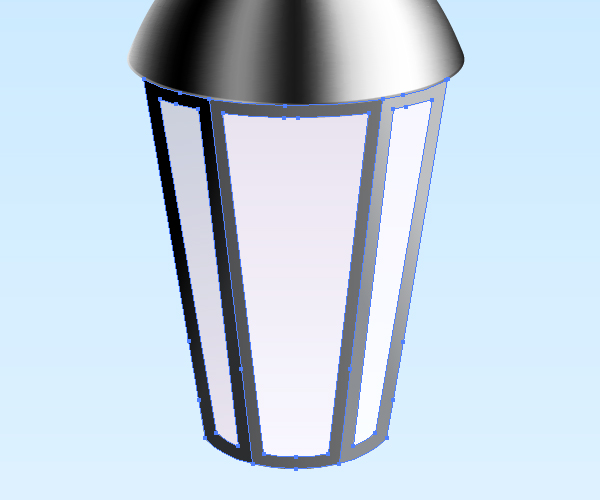
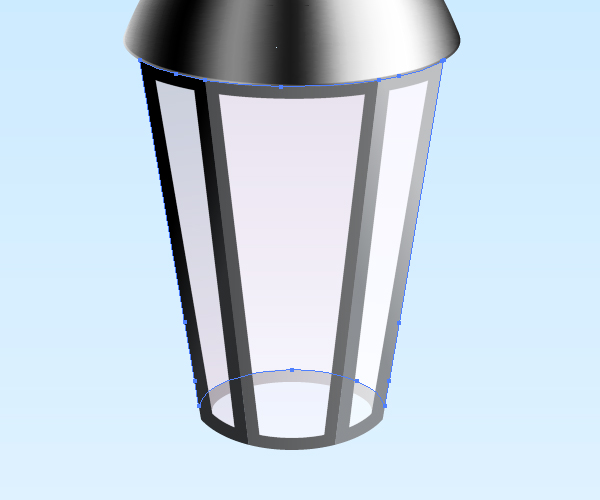
 Then select the shown part of the lantern, which consists of two paths: the metallic one and the glass one,…
 …and go to Object > Compound Path > Make (Command + 8).
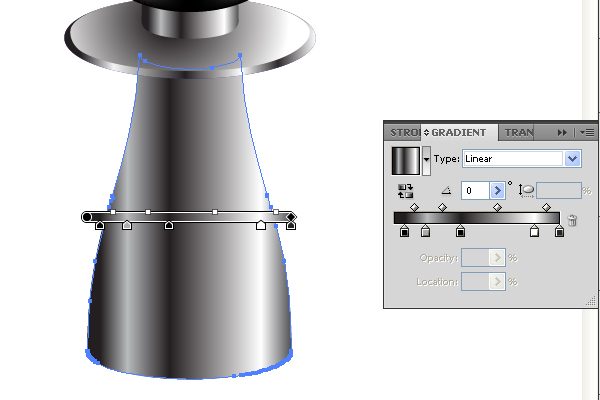
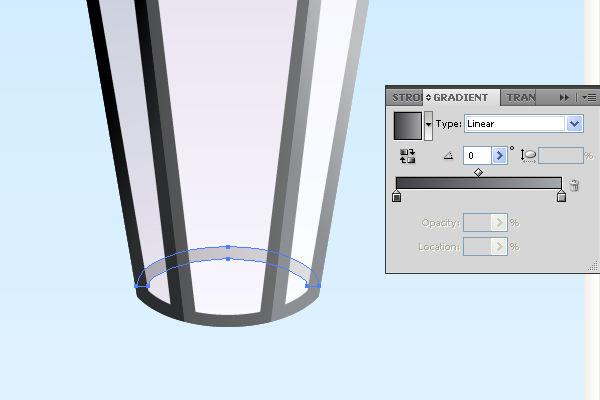
 Fill it with a linear gradient.
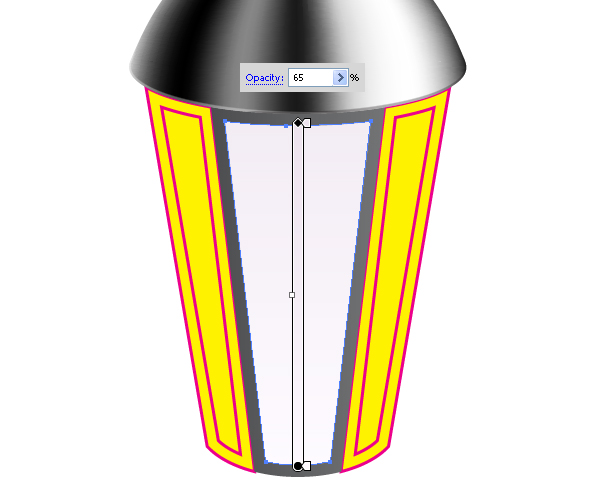
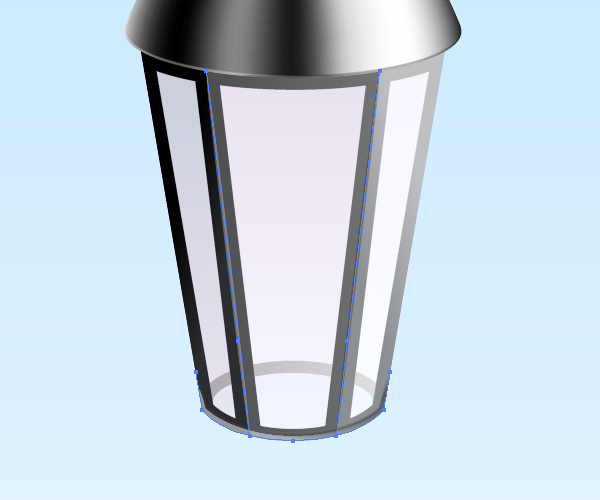
 Now fill the glass path with a vertical gradient and decrease the Opacity of it.
 Do the same with other glass and metallic parts of the lantern.

 The back part of the lantern is produced by copying the front part of it and pasting it in back (Command + C then Command + B).
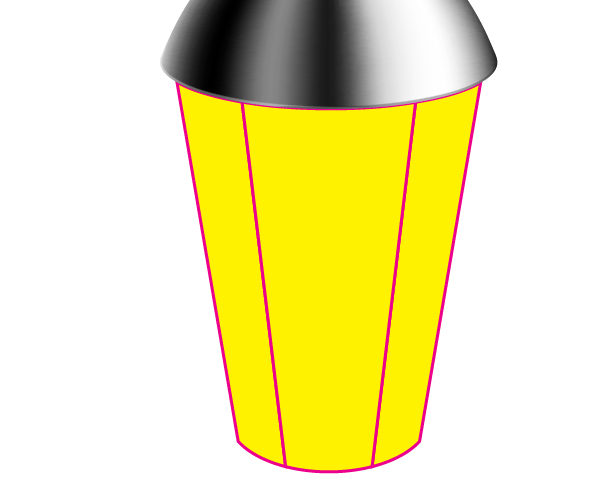
 The lamp itself is a truncated pyramid with six lateral planes.
Therefore, the back metallic parts are invisible. This is right. But to
consider the angle of view, it becomes clear that the lamp needs a back
set of detail in the lower metallic part. Sketch it as shown below and
fill it with a linear gradient.
The lamp itself is a truncated pyramid with six lateral planes.
Therefore, the back metallic parts are invisible. This is right. But to
consider the angle of view, it becomes clear that the lamp needs a back
set of detail in the lower metallic part. Sketch it as shown below and
fill it with a linear gradient.
 Now the hind part of the lamp must be cropped with a clipping mask,
which is formed with the help of the semi-circular detail just
illustrated.
Now the hind part of the lamp must be cropped with a clipping mask,
which is formed with the help of the semi-circular detail just
illustrated.
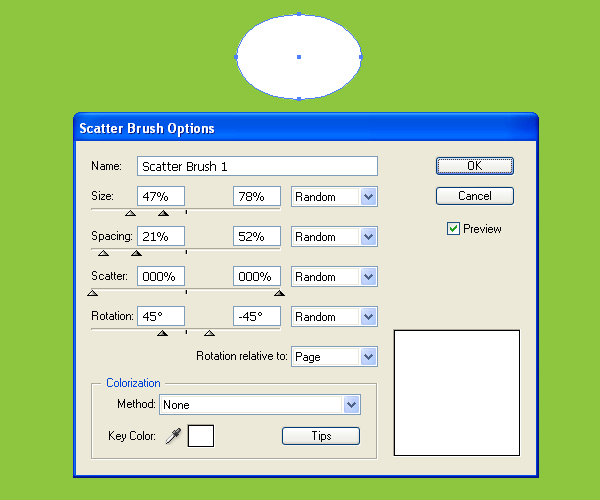
 Sketch now the light spots on the frosted glass of the lantern. First produce a regular white and not too long stroke.
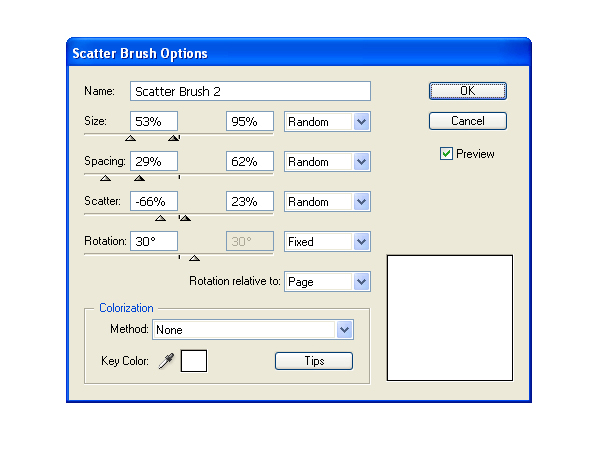
 Then drag and drop it into the Brushes palette. Select the Scatter Brush option in the dialog box.
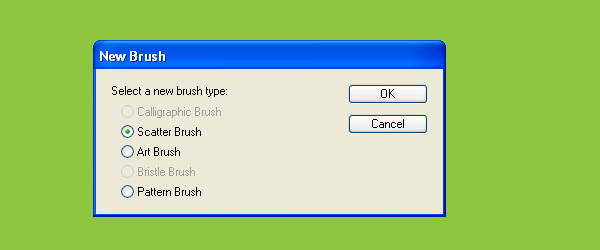 Set the items for the brush as shown in the diagram below.
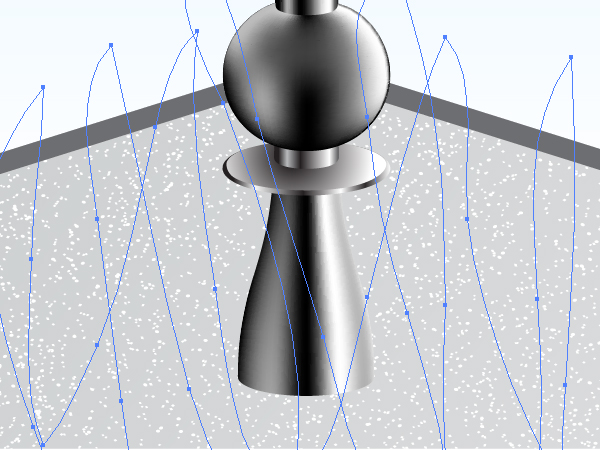
 Now take the Paintbrush Tool (B), and while the Scatter brush is
selected in the Brushes palette, place different strokes over the lamp
glass. Then crop all the strokes with a corresponding clipping mask,
change the Opacities and the stroke weights of them.
Now take the Paintbrush Tool (B), and while the Scatter brush is
selected in the Brushes palette, place different strokes over the lamp
glass. Then crop all the strokes with a corresponding clipping mask,
change the Opacities and the stroke weights of them.
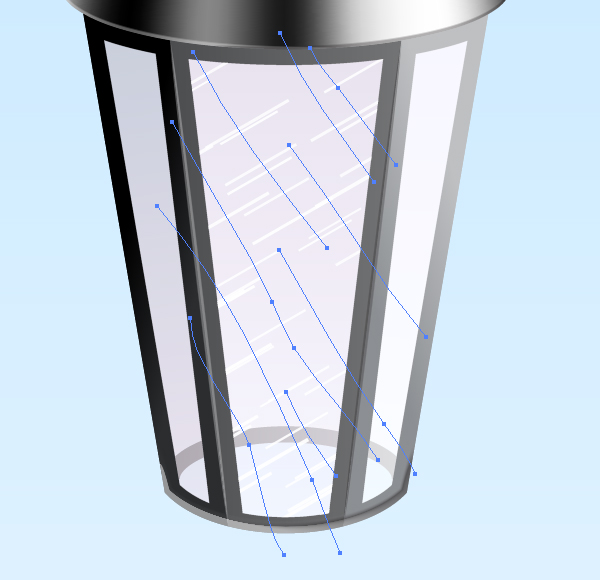 Illustrate the similar light spots on the lateral glasses as you see
fit, because they can be close to invisible at such an angle of view.
Illustrate the similar light spots on the lateral glasses as you see
fit, because they can be close to invisible at such an angle of view.
 The coupling point of both lamps (shown with green below) is not as beautiful as it could be.
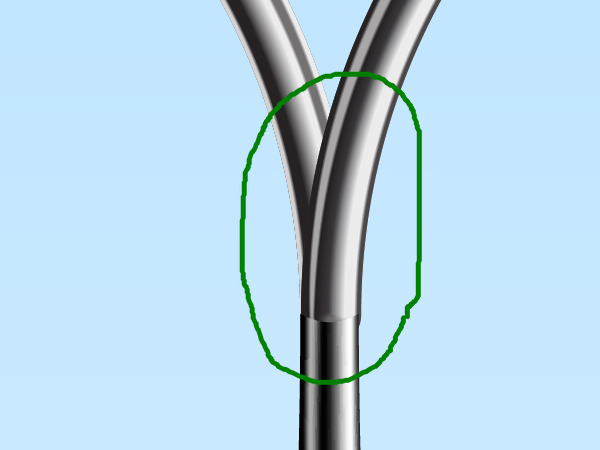 You can improve it in an artificial way. Let’s see how it works.
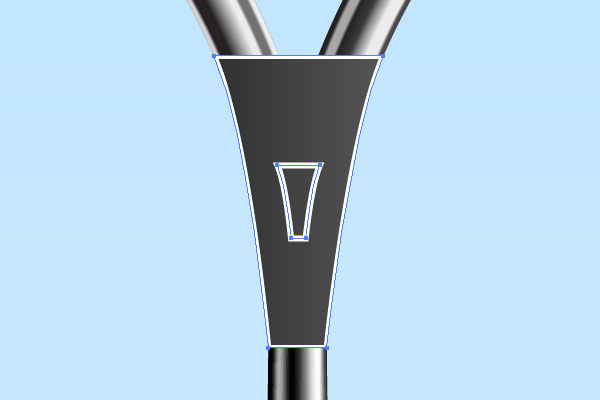
First draw the shown path filled with a linear gradient. It is flat and
simple now.
You can improve it in an artificial way. Let’s see how it works.
First draw the shown path filled with a linear gradient. It is flat and
simple now.
 Now sketch the following two paths over it without the filling.
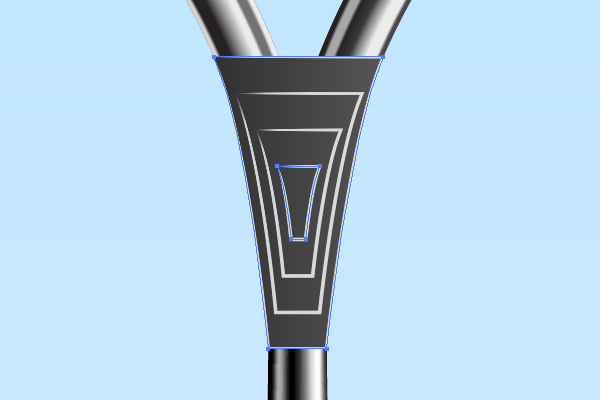
 Go to Object > Blend > Blend Options, and set the Spacing to Specified steps and the quantity of steps to 2.
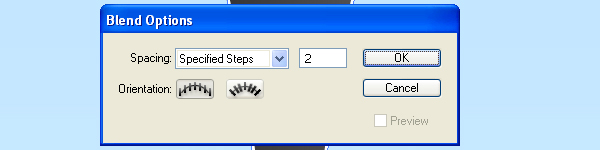 Select both white paths, go to Object > Blend > Make (Command +
Alt + B). Apply the “White brush” to the paths of the blend, crop the
blend with a clipping mask, change the Opacity of it and the Stroke
weight of its paths. This adds volume to the coupling detail.
Select both white paths, go to Object > Blend > Make (Command +
Alt + B). Apply the “White brush” to the paths of the blend, crop the
blend with a clipping mask, change the Opacity of it and the Stroke
weight of its paths. This adds volume to the coupling detail.
 Picture a border of the ground.
 Now create a ground texture using this Scatter brush.
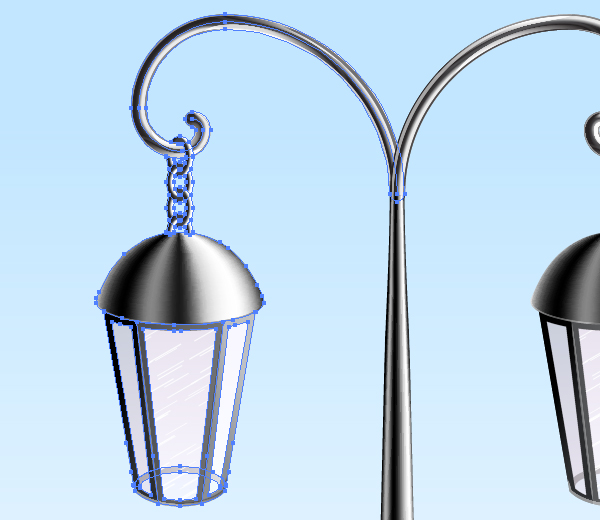
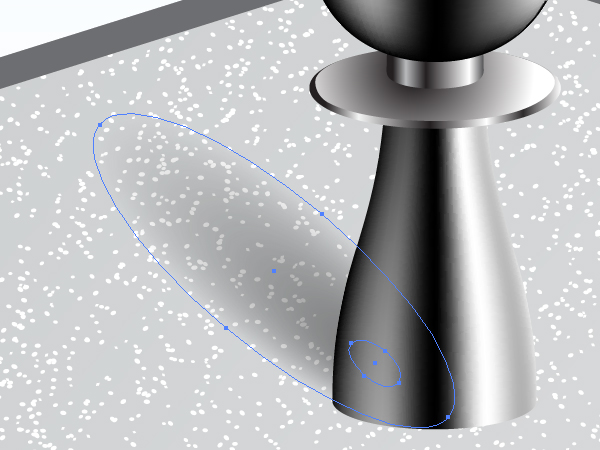
 Illustrate a soft shadow from the lantern. Pay attention that the
soft enough shadows can be pictured with the usual elliptical paths in a
blend, whereas the hard enough shadows must retrace the original object
form.
Illustrate a soft shadow from the lantern. Pay attention that the
soft enough shadows can be pictured with the usual elliptical paths in a
blend, whereas the hard enough shadows must retrace the original object
form.
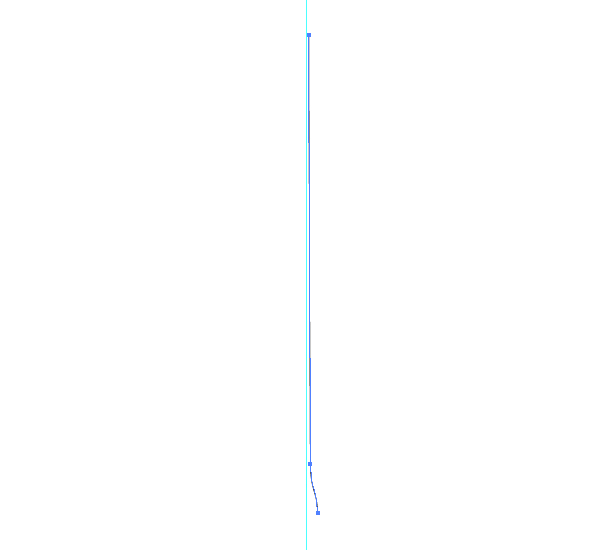
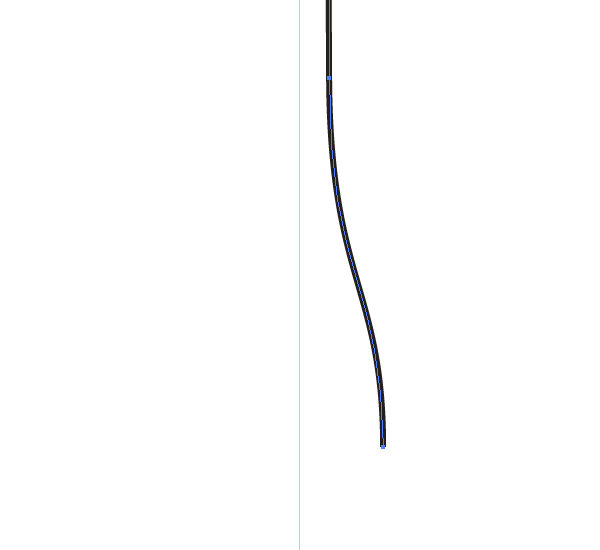
Step 1
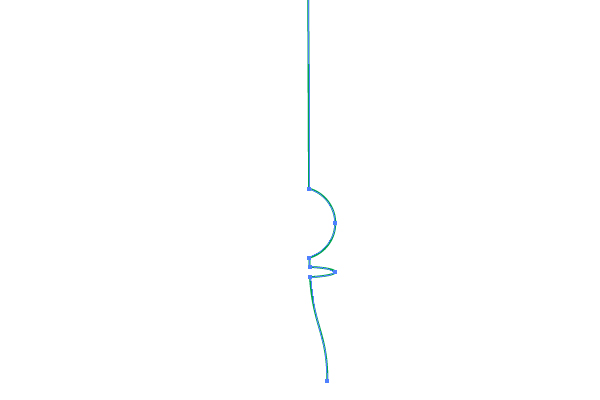
First, go to View > Rulers > Show Rulers (Command + R). Then drag the vertical guideline from the ruler and drop it in your artwork area. Lock the guideline in the Layers palette. After that illustrate the path bent in its lower part.Step 2
Now lock all the paths with the exclusion of the ellipse. Blow up the artwork, take the Scissors Tool (C) and click on two points as shown.Step 3
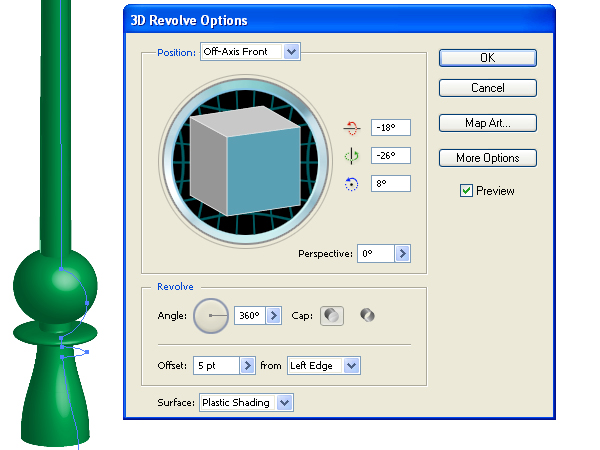
Go to Effect > 3D > Revolve, and create a basic support for the lamp.Step 4
Go to Object > Expand Appearance, then go to Object > Ungroup three times.Step 5
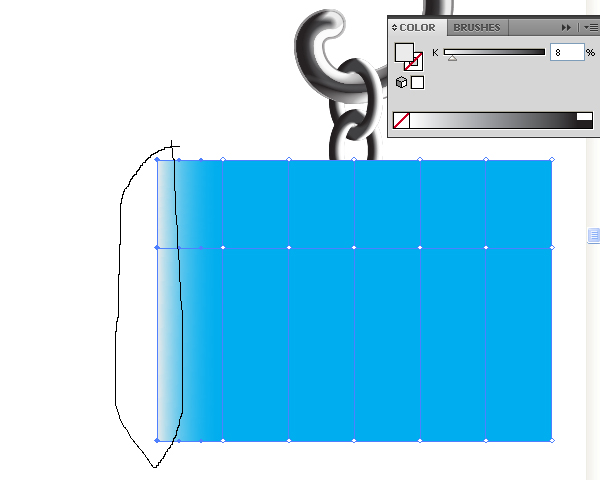
Select the blue path and fill it with a linear gradient.Step 6
Now select the red path and go to Object > Create Gradient Mesh…Step 7
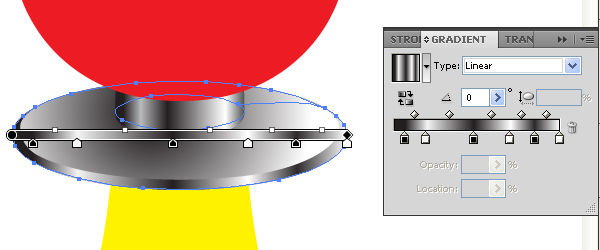
Fill the yellow path with a linear gradient as shown below.Step 8
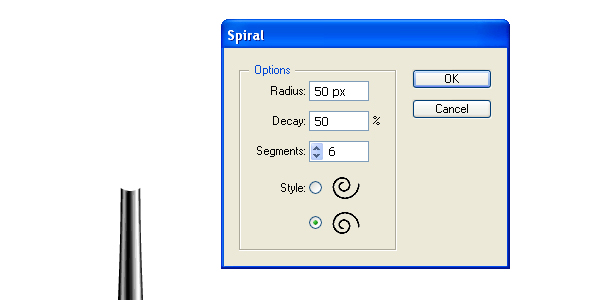
Take the Spiral Tool, click in the artwork area, and specify the suitable values for the options in the dialog box.Step 9
Take the Ellipse Tool (L) and draw an elongated, horizontal, elliptical path filled with black. See the helpful diagram below, where the green background is made for your convenience only, and not important for this tutorial.Step 10
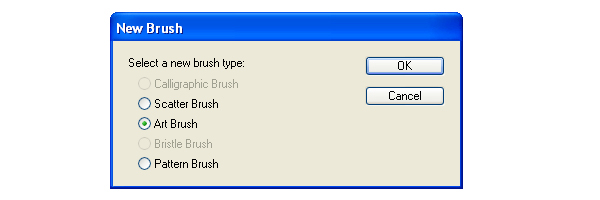
Drag and drop this blend into the Brushes palette. Select the Art Brush option in the dialog box.Step 11
Now sketch a usual ellipse, filled with gray.Step 12
Copy the spiral path and paste in front (Command + C then Command + F). Go to Object > Expand. Then go to Object > Ungroup.Step 13
Picture the next path, and apply the “Black brush” to it in order to emphasize the border of the path. Change the Opacity and the Stroke weight. Crop the path with the existing clipping mask.Step 14
Usually the big, metallic objects are marked out from the surrounding background well. Therefore it is correct to emphasize the borders of the objects.You can do it by using the Art brushes and decreasing the Stroke weights of the paths. But pay attention that you need to use brushes that differ in color from the surrounding pixels of the objects. In order to see how this rule works let’s illustrate the first path shown in the area of light, then apply the “Black brush” to it.
Step 15
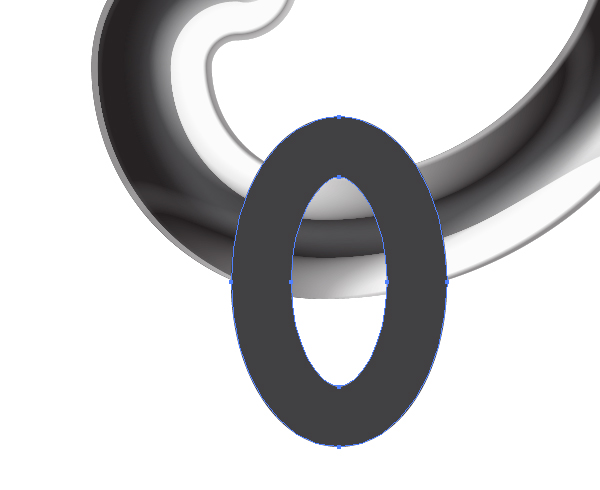
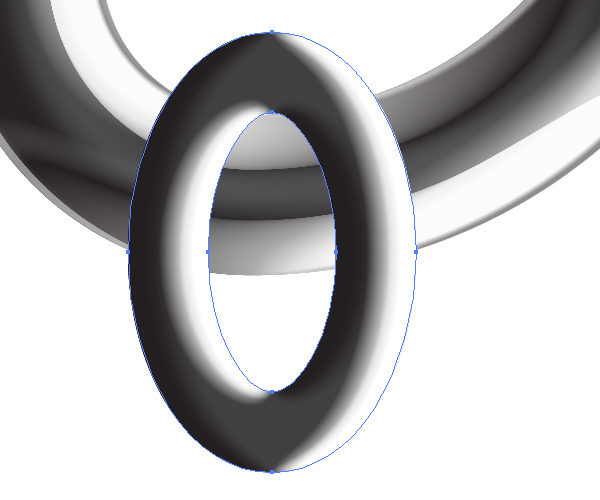
In order to picture a chain, first draw a compound path using the Ellipse Tool (L), then fill it with a dark gray.Step 16
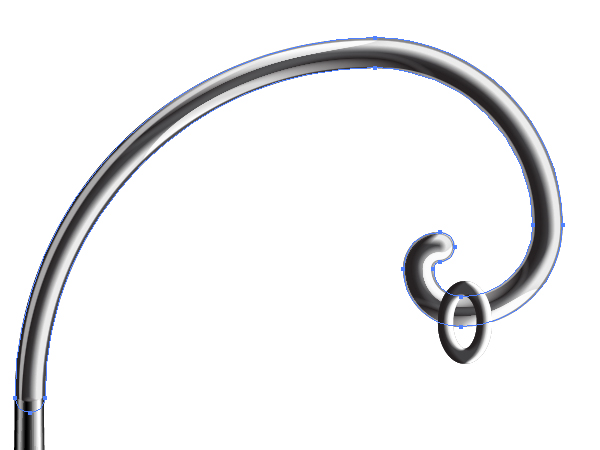
You are likely considering how to put this ring on the helix? First select the spiral contour (you can select the clipping path itself), Copy it and Paste in Front (Command + C then Command + F),…Step 17
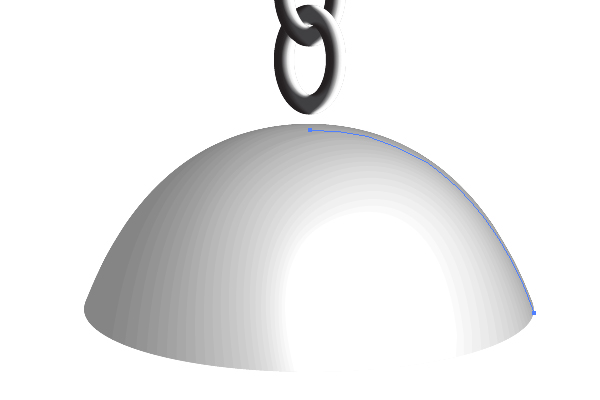
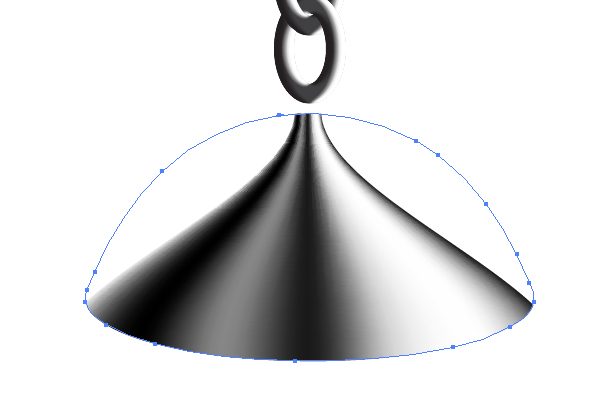
In order to outline a cap of the lantern, draw the curved path and go to Effect > 3D > Revolve. You should receive something like the following:Step 18
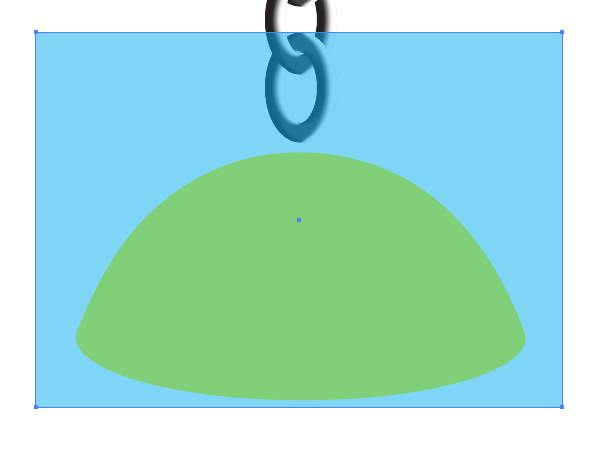
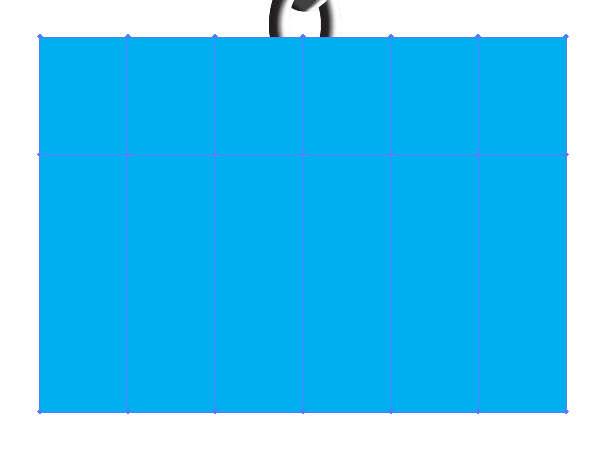
Now let’s look at how to paint it this. To use gradients here would be a poor decision, because we need to form a hemisphere with color distribution. What if we use meshes? Let’s make an attempt. Take the Rectangle Tool (M) and illustrate the following semitransparent path over the yellow one.Step 19
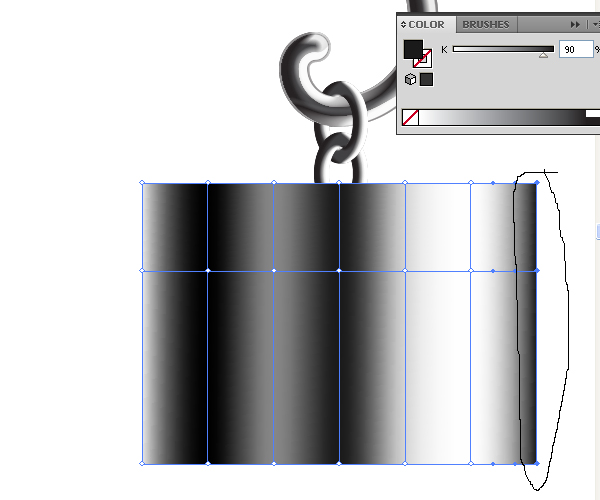
Now take the Lasso Tool (Q) and select the mesh nodes from the left to the right, and change the colors of them. (The clipping path is invisible in the both diagrams below for your convenience).Step 20
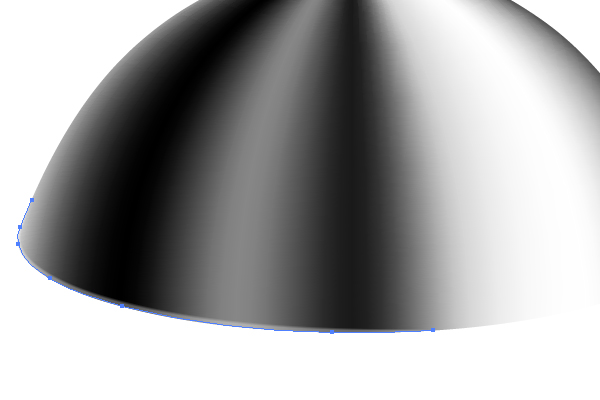
In order to emphasize the border of the hemisphere, apply the “White brush” to the following path.Step 21
Produce three paths of the lantern, as shown below.Step 22
We need to separate the glasses of the lantern from the metallic body of it. This is because the frosted glass of the lamp is semitransparent. Select a glass outline, Copy it, and Paste in Front (Command + C then Command + F).Step 23
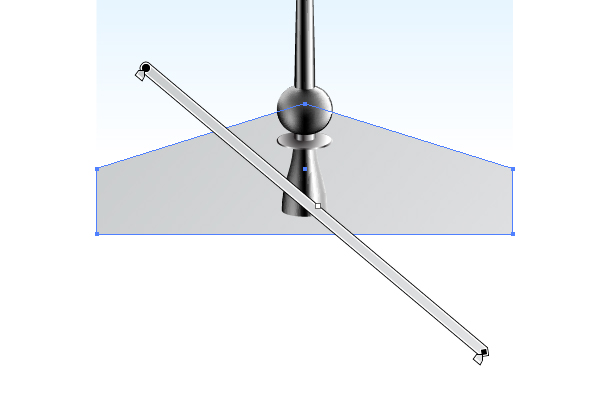
You can illustrate now the background as shown in the figure below.Step 24
Make the metallic borders softer by applying the Art brushes (“White”, “Black”, and “BW” brushes) to them as you can see in the diagram below.Step 25
Picture the second lamp the same way.Step 26
Draw a path filled with an angled linear gradient in the lower part of the lantern.Step 27
After that produce the next Scatter brush from the small ellipse with a long axis, which equal to several pixels only.Conclusion
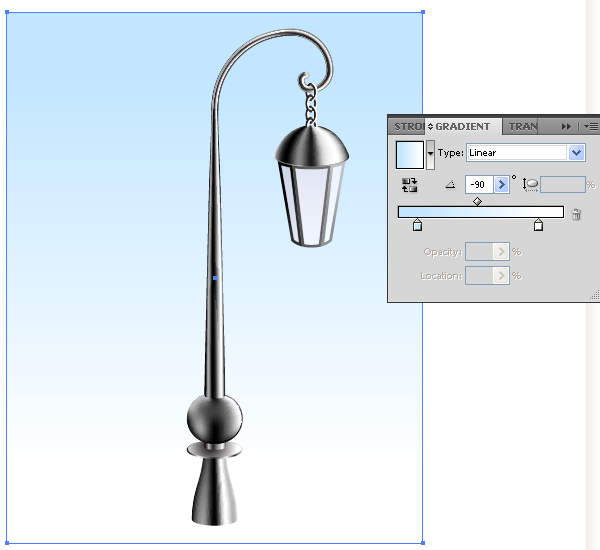
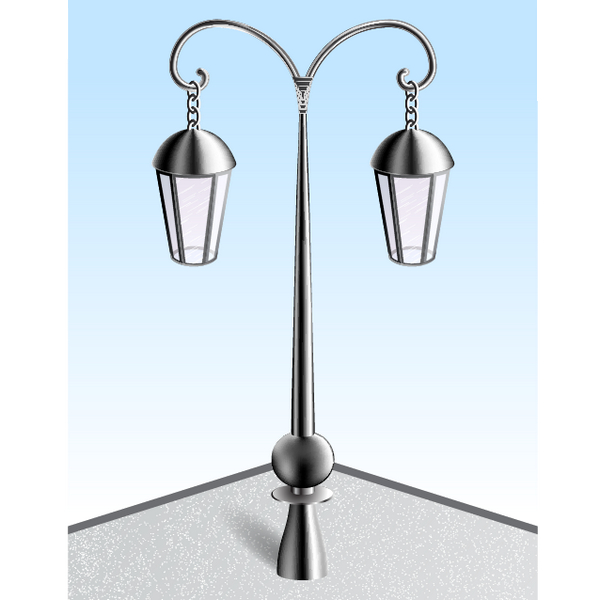
The final image is shown below.
Source www.vectortutsplus.com