

- Program: Adobe Illustrator CS3
- Difficulty: Intermediate
- Estimated Completion Time: 3 hours
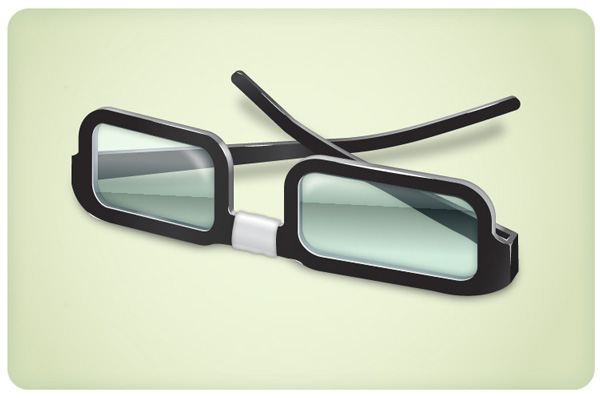
Final Product What You'll Be Creating
Step 1
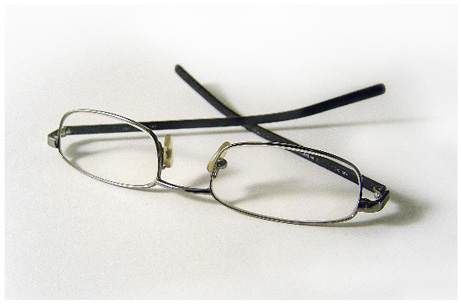
Start by taking a photo of some glasses. Make sure to take it at a high enough resolution so it won’t be pixelated when viewed at larger sizes while you’re working.The end result is much more cartoonish and geeky. If your glasses are not exactly as you would like the illustration to appear you will need to improvise while you are making the illustration. After all, the photograph is just a reference anyway. We will be deviating from the actual photo in the final icon.
Step 2
Place the photo on its own layer and lock the layer. Using the Pen Tool (P) and draw around the edge of the glasses frames. Give the stroke a thick weight. We will convert the stroke to a shape in a later step. This will save us the hassle of drawing two different rectangles to make the frame of the glasses.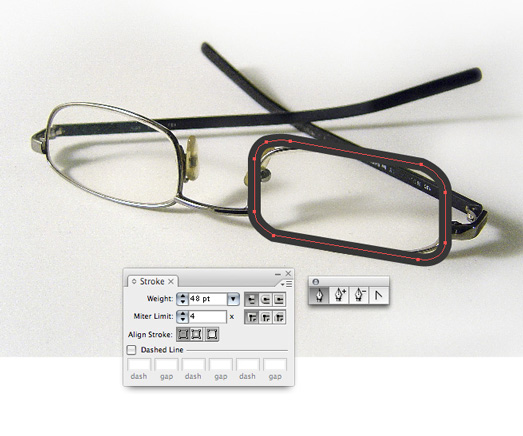
Step 3
Trace the arm of the glasses next. Give this stroke a Round Cap by clicking on the option highlighted below.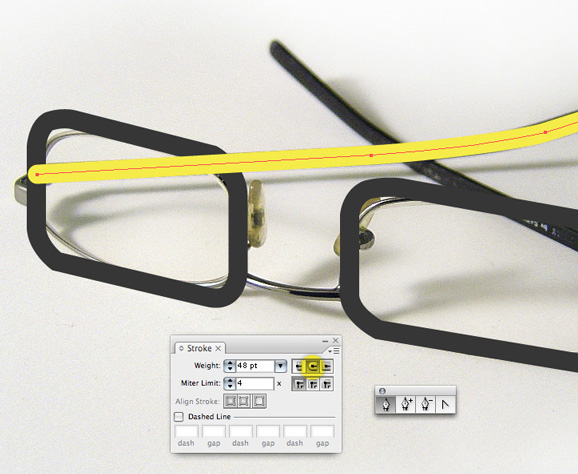
Step 4
When you are finished tracing both arms and frames expand your strokes by going to Object > Expand…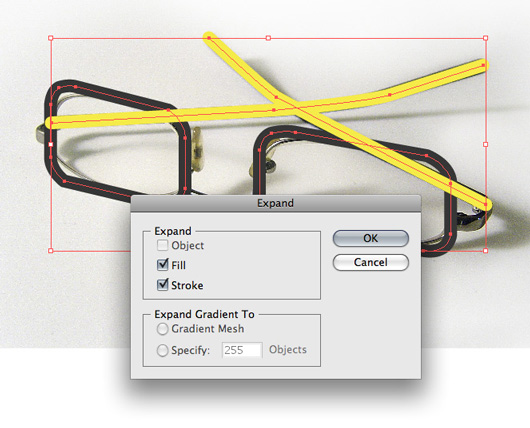
Step 5
Using the Direct Selection Tool (A) move the points around to make the arm of the glasses thicker toward the front, where they connect to the lens area.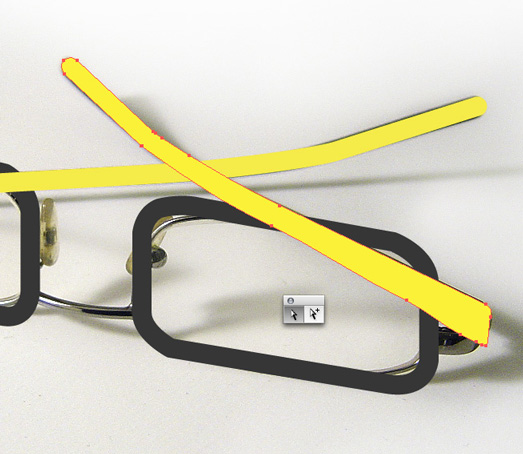
Step 6
You can also delete points if they are hindering you while you move other points around.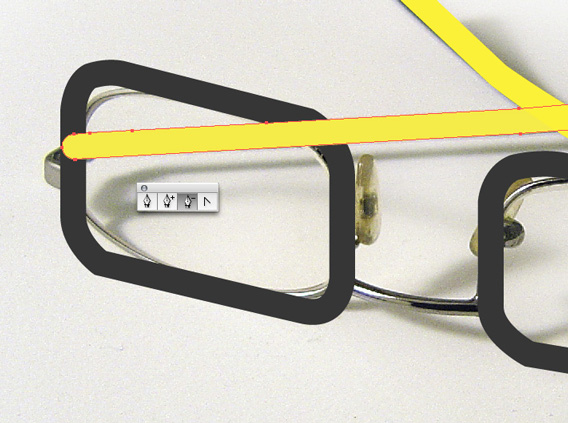
Step 7
Since I am going for a dorky look I decided to make the middle part of the glasses much bigger. This area is completely made up in terms of how it looks. Don’t be afraid to deviate from the photo. You have to know when to follow the rules and when to break them. Right now is the perfect opportunity to break them.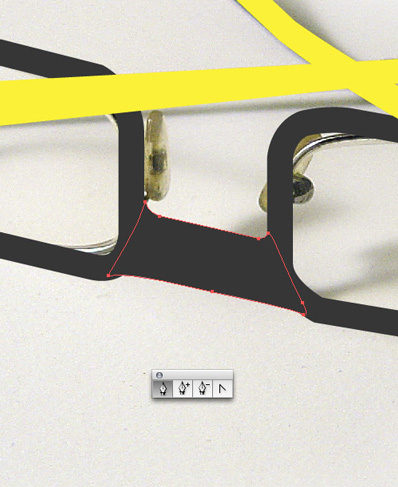
Step 8
This is what your icon should look like right now.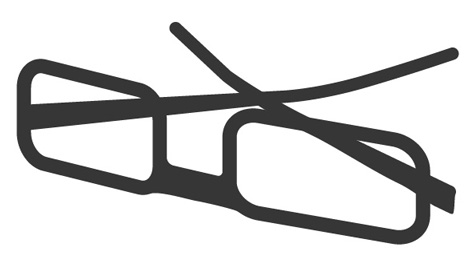
Step 9
Zoom in and make sure your lines are all smooth. This step goes a long way in the end result. Spend a little time now to save a lot of headache later.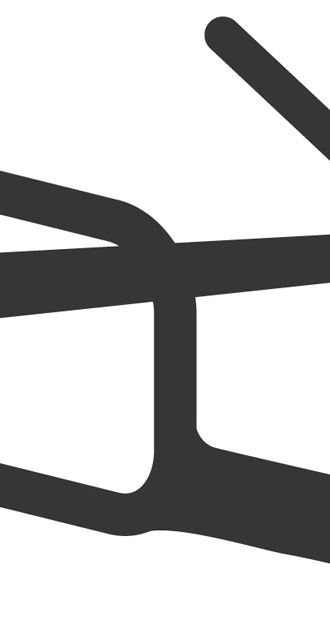
Step 10
Give the glasses depth by duplicating each section of the glasses. Hold down Option while you click and drag the shape to duplicate each shape.
Step 11
Using the Pen Tool draw in the left side of the glasses that connect the frame to the arm.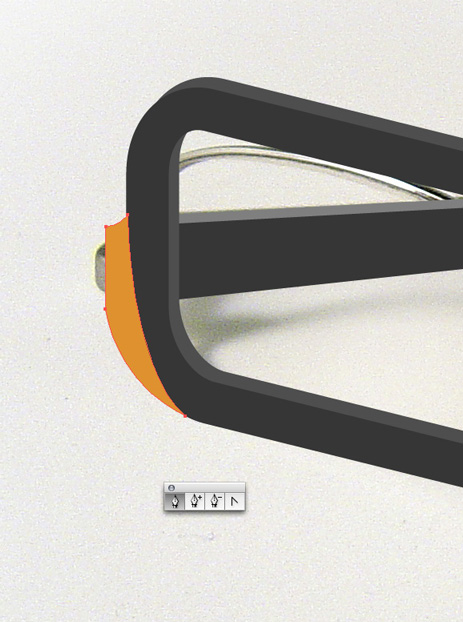
Step 12
Now draw the right side. Notice again that the illustration is a little different from the photograph. Since the arms of the glasses are much larger, the shape connecting the frames and arms will need to be bigger too. Also keep in mind the the final result we are achieving is that of an icon. Most icons have simple shapes so don’t get too concerned with following every detail of the photograph. It is very much a balancing act that you will learn over time and experimentation.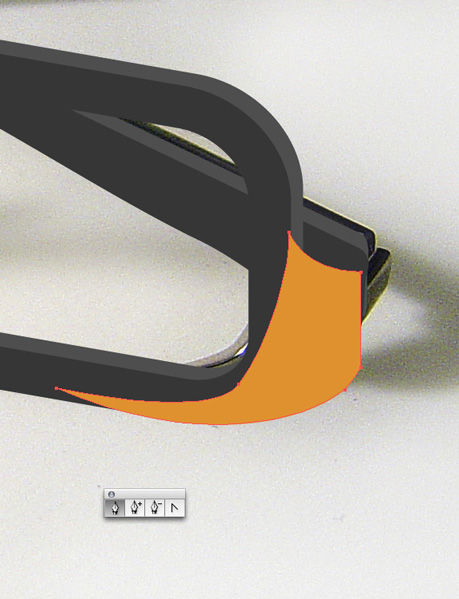
Step 13
Give the connecting shape depth by duplicating it as well.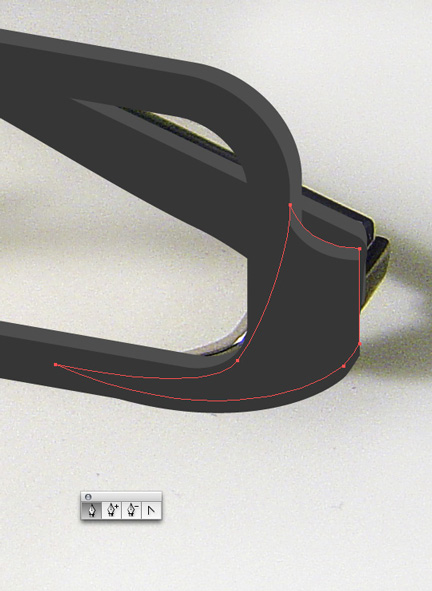
Step 14
Draw the top and side to finish off the connection.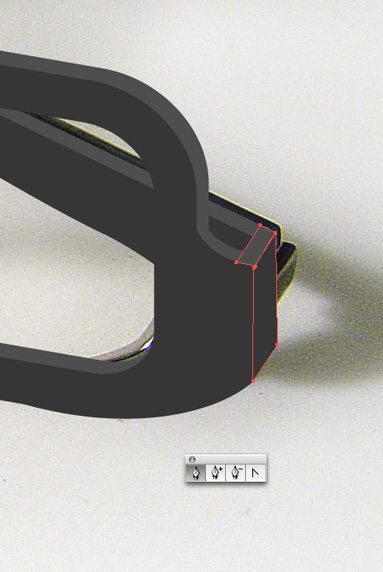
Step 15
Observe how the basic shape of the icon differs from the photo.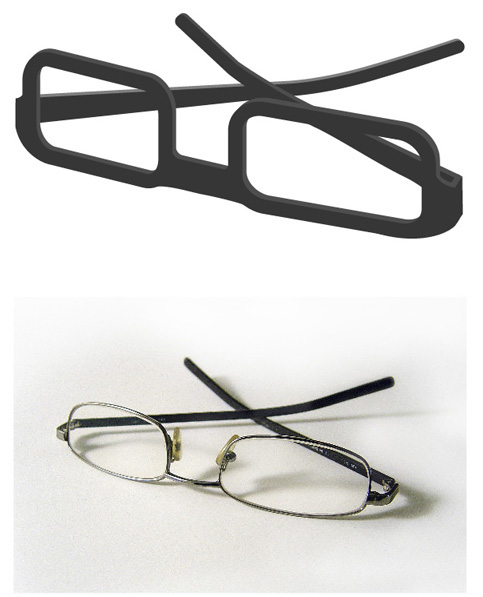
Step 16
Make the lens of the glasses by duplicating the frame, drawing a shape behind it and using the Pathfinder to Divide the shapes. Once you divide the shapes go to Object > Ungroup to select just the lens area. Delete the unused portions that are leftover.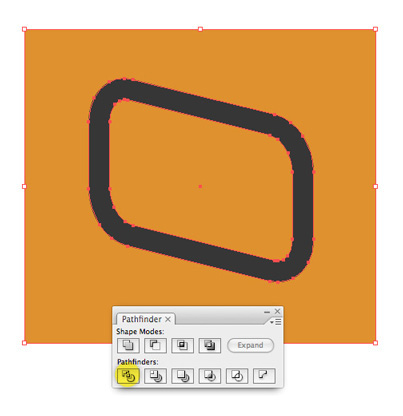
Step 17
Position the lenses over the frames.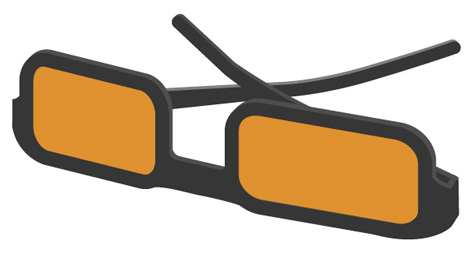
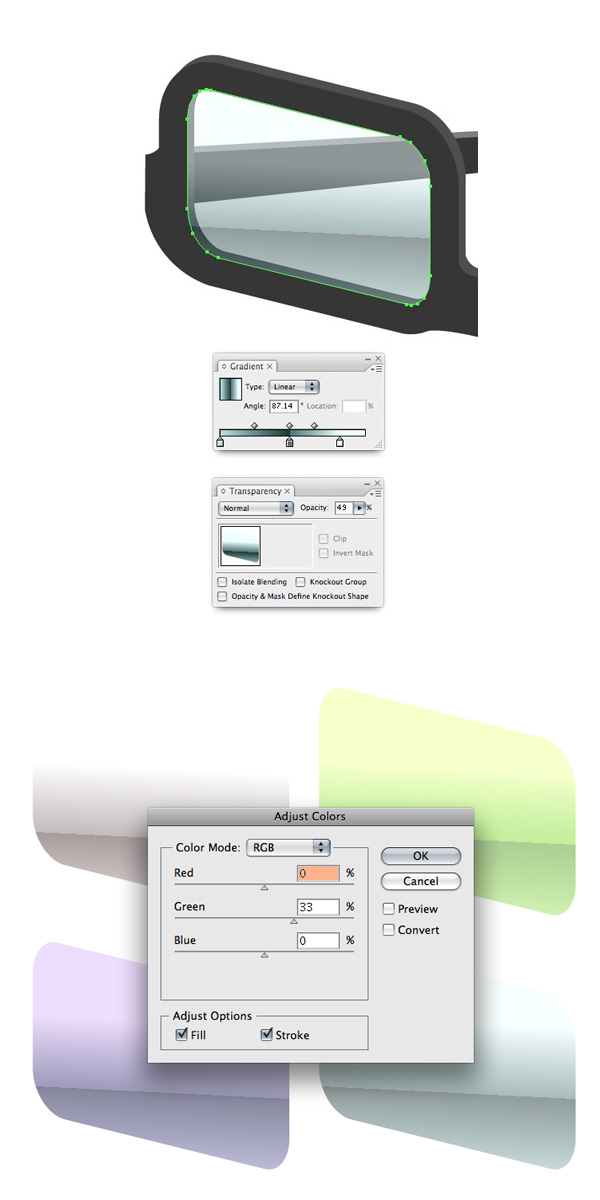
Step 18
Select both lenses and give them a gradient. Play around with colors and the angle of the gradient until you find something that you like. In the Transparency Palette adjust the opacity of the lens to about 50%.To fine tune the colors you can select Edit > Edit Colors > Adjust Color Balance… and alter them more (as indicated in the bottom screenshot).
Step 19
Next we will create a piece of white tape that will wrap around the middle of the frames. For arbitrary shapes I find it easiest to use the Pencil Tool (N) to draw the shape. The Pencil Tool lets you draw as if you were actually using a pencil, in one continuous stroke. Since the piece of tape should have a more natural look this works perfectly. Tip: When drawing with the Pencil Tool, you can close the shape anytime by pressing Option then releasing the mouse button.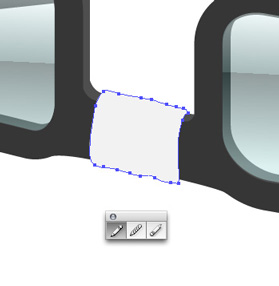
Step 20
Give the piece of tape a detailed gradient. Notice that the bottom of the tape has a highlight that suggests light is bouncing from off of the surface that the glasses are sitting on.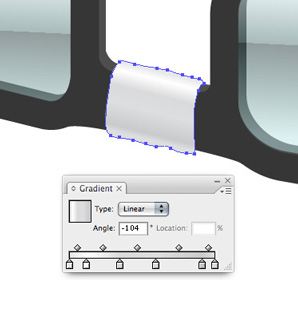
Step 21
Give the tape a dark Inner Glow by going to Effect > Stylize > Inner Glow.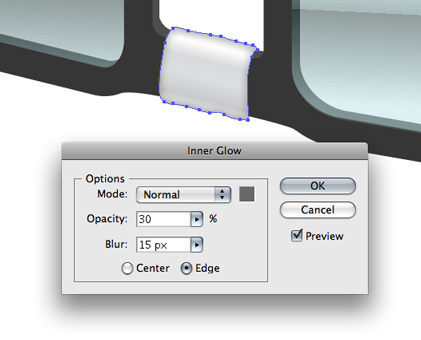
Step 22
Last, give the tape a slight drop shadow by going to Effect > Stylize > Drop Shadow.
Step 23
Small details go a long way. Add a dark inner glow to the lenses by going to Effect > Stylize > Inner Glow… I decided to use a dark blueish green for the inner glow so it will blend better with the color of the lenses.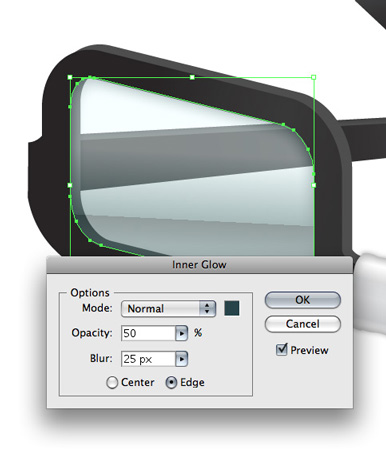
Step 24
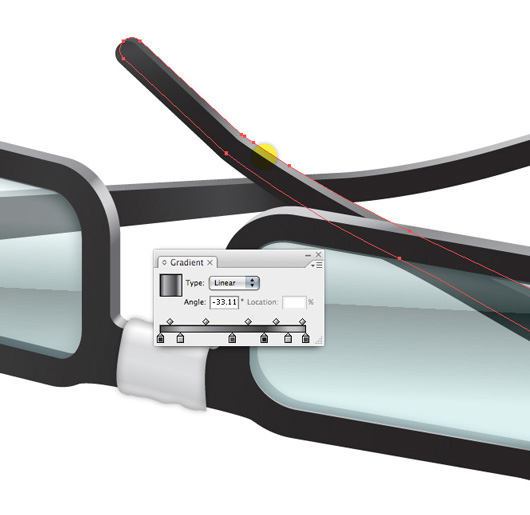
Next we will accentuate the frames of the glasses. Select the sections one at a time and give them complex gradients. Pay attention to where light will hit each area of the frame. Try to get your gradient to be lighter in those areas. In the image below, I’ve indicated the area of the arm of the glasses that should be the lightest.Also, give each section of the area you are highlighting an inner glow by going to Effect > Stylize > Inner Glow… This inner glow should be delicate as to not impeded too much with the gradients you apply.
Step 25
Select another section of the frame and give that a complex gradient. Again, the area that should have the most highlight is indicated below. Note that there can be multiple areas that have highlights.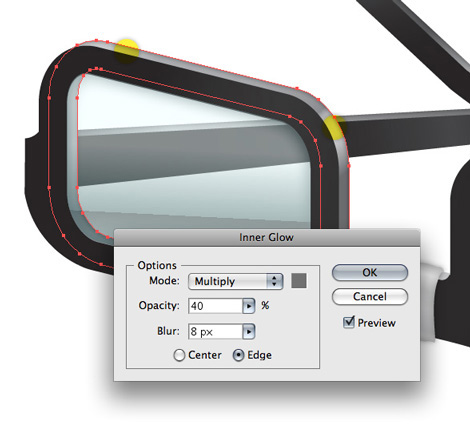
Step 26
Give the shape that connects the frame and arm of the glasses a subtle gradient as well.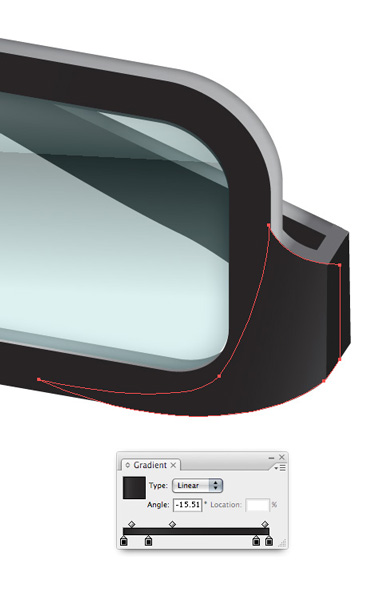
Step 27
The entire face of the glasses has a very simple gradient that almost goes unnoticed. When it comes to the face of the glasses, since it’s all flat my use of the gradient is arbitrary. Just make sure it’s subtle.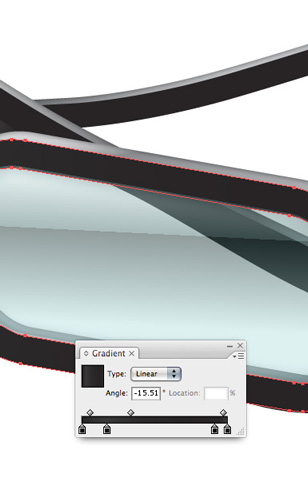
Step 28
Add some well-placed highlights that help define any visually uninteresting areas or areas that obviously would be reflecting light.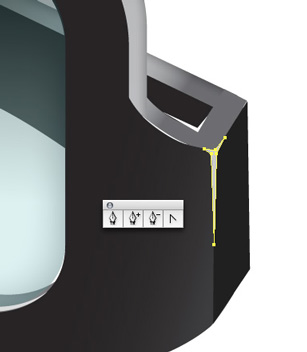
Step 29
A slight highlight on the edge of the lenses is a must. Instead of tediously drawing a highlight along the edge of the lens use the Pathfinder to your advantage. Duplicate the lens and click on Subtract from shape area, as highlighted in the bottom screenshot.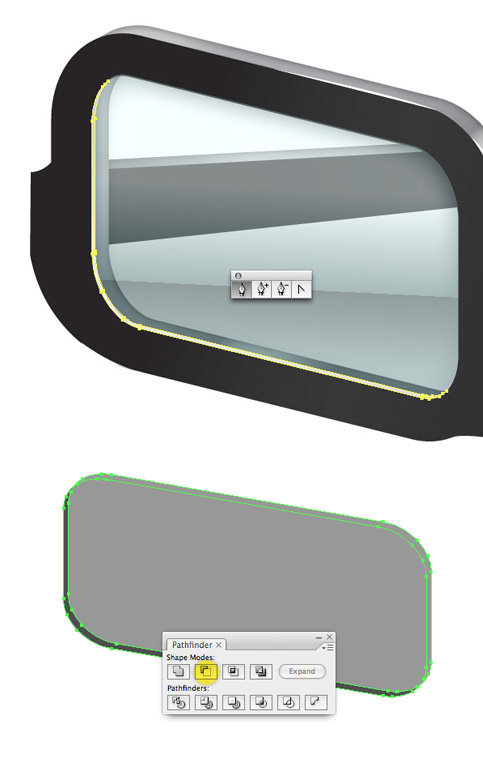
Step 30
To add another level of dimension to the lenses, draw an arc shape and blur it by going to Effect > Blur > Gaussian Blur… Adjust the opacity of the shape if you need to.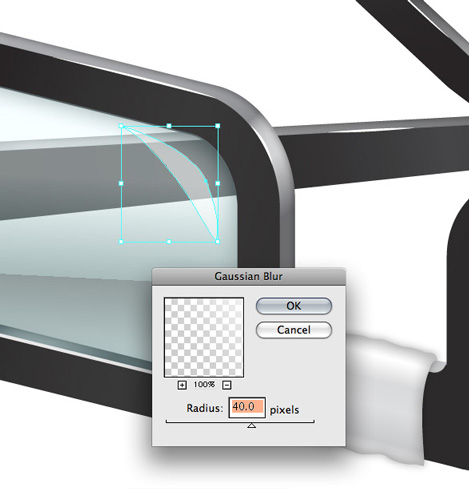
Step 31
The shadow will add a nice finishing touch to the glasses. The shadow is comprised of the two shapes that make up the arms and another horizontal line below. Select the shape and go to Effect > Blur > Gaussian Blur.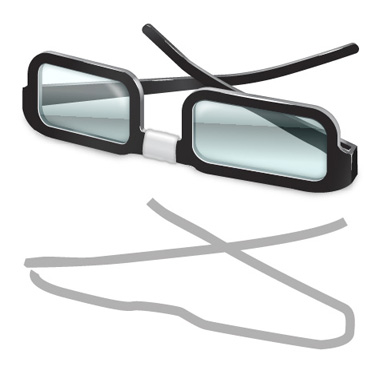
Step 32
You will notice that the tip of the arms of the glasses are curved slightly upwards. Reposition the points using the Direct Selection Tool to give the indication that the tip of the glasses do not sit flush with the table.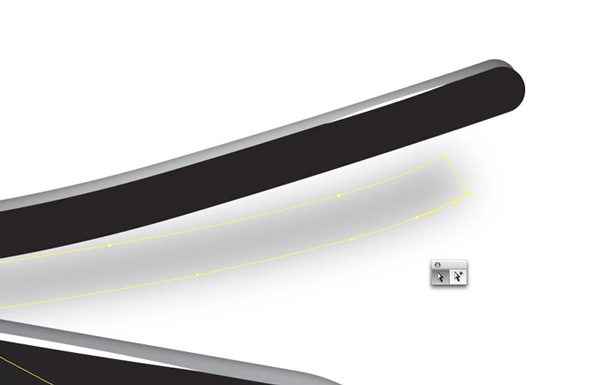
Step 33
Select the shadow. In the Transparency Palette set the mode to Multiply, so the shadow will blend better when you place a background behind it.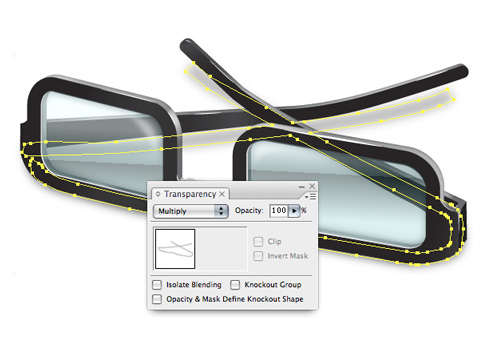
Step 34
Using the Rectangle Tool (M) draw a rectangle and give it a faint gradient.
Step 35
Round the corners of the rectangle by going to Effect > Stylize > Round Corners.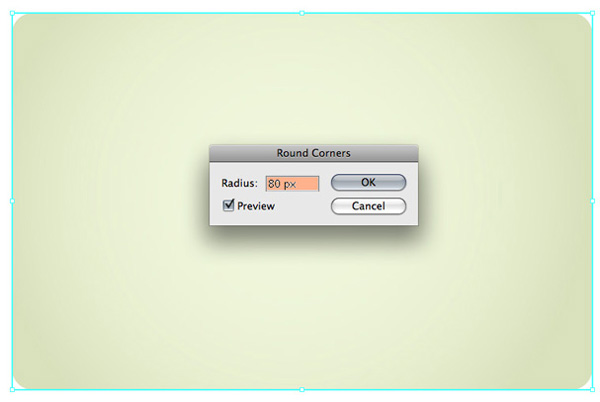
Step 36
Give the rectangle an inner glow by going to Effect > Stylize > Inner Glow.
Final Image
Here is the final vector glasses icon! As you will notice, the final result is a little different from the photograph. That’s the beauty of illustrating something, you can make it exactly as you want it.
http://vector.tutsplus.com/tutorials/illustration/how-to-turn-glasses-into-a-great-geek-icon/
Tidak ada komentar:
Posting Komentar